Sources and extracts
Configure, schedule and monitor your sources
You can then begin setting up extracts by clicking on the source and clicking Add extract. A new prompt will appear that requires fields to be filled in, detailing which endpoint/table to extract data from.

Entering a source that has been set up will allow the user to create data extracts to specific endpoints in data source. Multiple instances of the same connector can be set up as different sources.
Here you will be asked for a number of details:
Extract properties:
- Extract name
- This is just used for organisation, we suggest naming it based on the data you are looking to extract. E.g. "User events"
- Description
- Again, this is just for reference, so an example may be: "Daily extract of all mongoDB user events"
- Status
- Keep this as "active" when first setting up an extract. If you ever have an extract scheduled, however for any reason you do not want it to run on this schedule, you can switch this to "pause".
- Pausing will not pause or stop any currently running extracts.
Load method:
The load methods is in relation to the way the data is loaded into the destination table.
- Drop, create, load
- This will delete the destination table, recreate the table, then load in the new data.
- Truncate, load
- This will remove any old data from the table, then add in the new data, the column names and table schema will persist.
- Append
- This will add any new data to the bottom of the destination table, any old data will not be deleted. If incremental is supported, then it will be executed automatically, if the load method is set to append.
Extract type:
- This can be either Full or Incremental.
- A Full extract type will extract all of the data that the connector possibly can, then loaded into the destination table depending on the load method.
- Incremental allows an extract to only pull data which is needed. Therefore, not pulling data which you already have in your destination table.
- This works usually by first checking the destination table for the most recent row of data. What is most recent is defined by the incremental key. In most cases, this is an
updated_atfield. The equivalent SQL command for this would be:
SELECT MAX(updated_at) FROM <destination_table>;- Once the extract has this date, it then only requests data which has been updated since this date.
- The incremental key for each connector, will be in the connector specific docs.
- This works usually by first checking the destination table for the most recent row of data. What is most recent is defined by the incremental key. In most cases, this is an
Destination table :
- This indicates the table name which will be filled with the extracted data. This can either be a pre-existing table or a non-existing table. You will also need to define the schema in the data you are referring to.
- An example of this would be
mongodb_raw.mongodb_user_events_raw. This example would reference a table calledmongodb_user_events_rawin themongodb_rawschema. If the table you reference in this field does not exist, then it will be created when the extract first runs. If the table you are creating does exist, then the data will be added to this table. Please note, if the load method is not "Drop, create, load" then the table definition (columns), must be exactly the same as the extract target data, otherwise an error will occur due to a mismatch of table dimensions.- Consequently, the order of columns must be the same to avoid clashing data types and the wrong data appearing in different columns.
When choosing the destination table, the Kleene recommendation is to follow this nomenclature: <source_name>_raw.<source_name>_<collection_name>_raw.
For example, data from the transactions collection from mongoDB will land into the mongodb_raw schema with table name mongodb_transactions_raw, hence mongodb_raw.mongodb_transactions_raw.
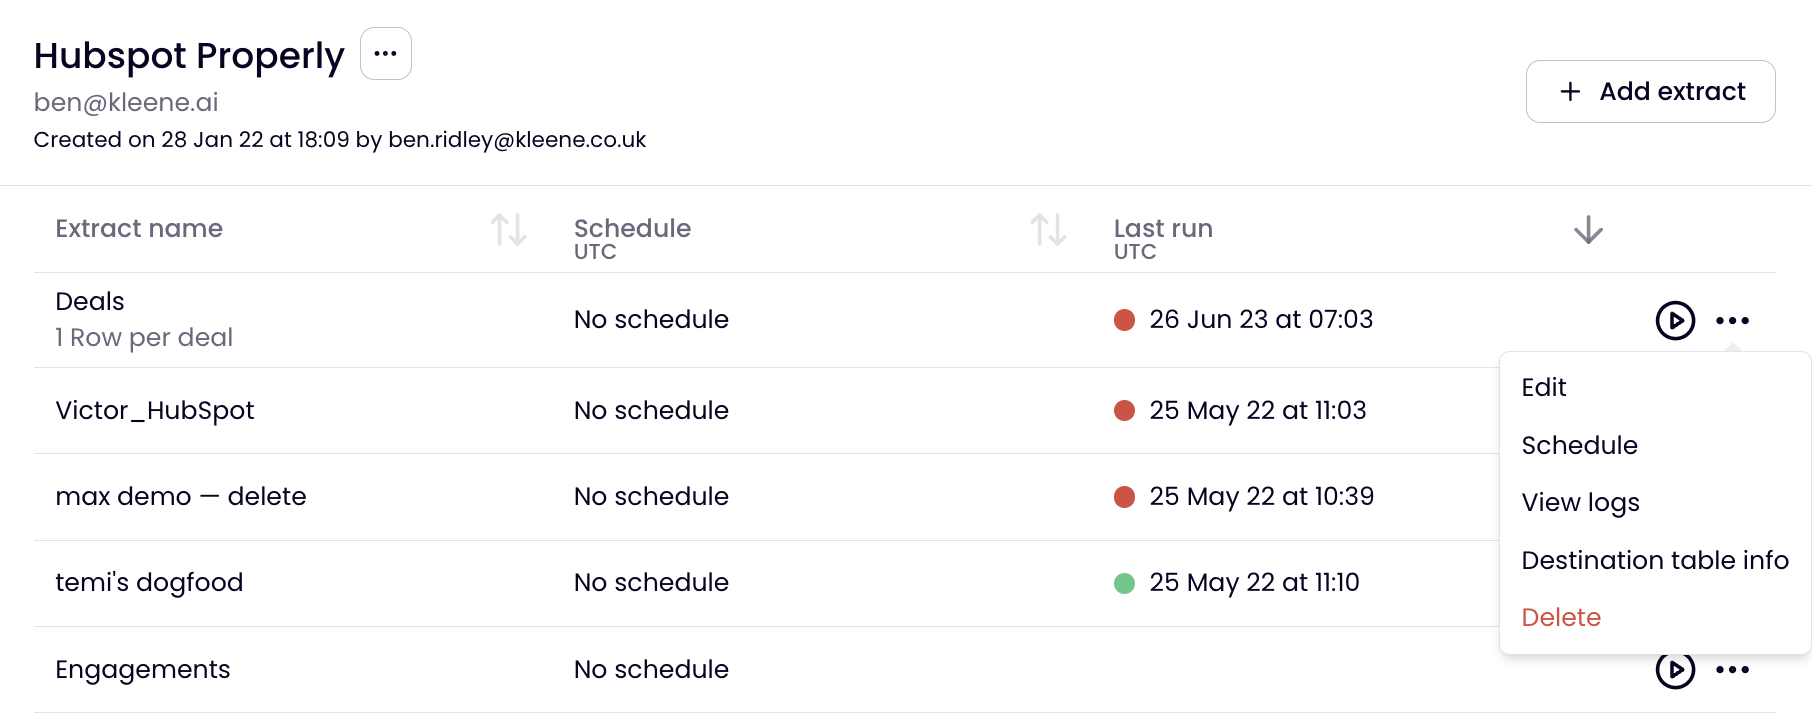
Once all the above is set up, click SAVE to save the extract in the app. This will now be visible under the source in the Your Sources and Extracts screen.
From here, the extract can be scheduled by clicking on the analogue clock symbol on the far right of the extract. It can also be run manually by clicking the play button or edited by clicking the pencil icon or deleted by clicking the bin icon.
Scheduling extracts is an important part of the pipeline, since this determines when data is extracted and loaded into the data warehouse, for the transform layer to operate on top of.
Additional functionality
Clicking the more menu (...) gives you further options, these include jumping directly to the Logs and destination tables for the particular extract.