
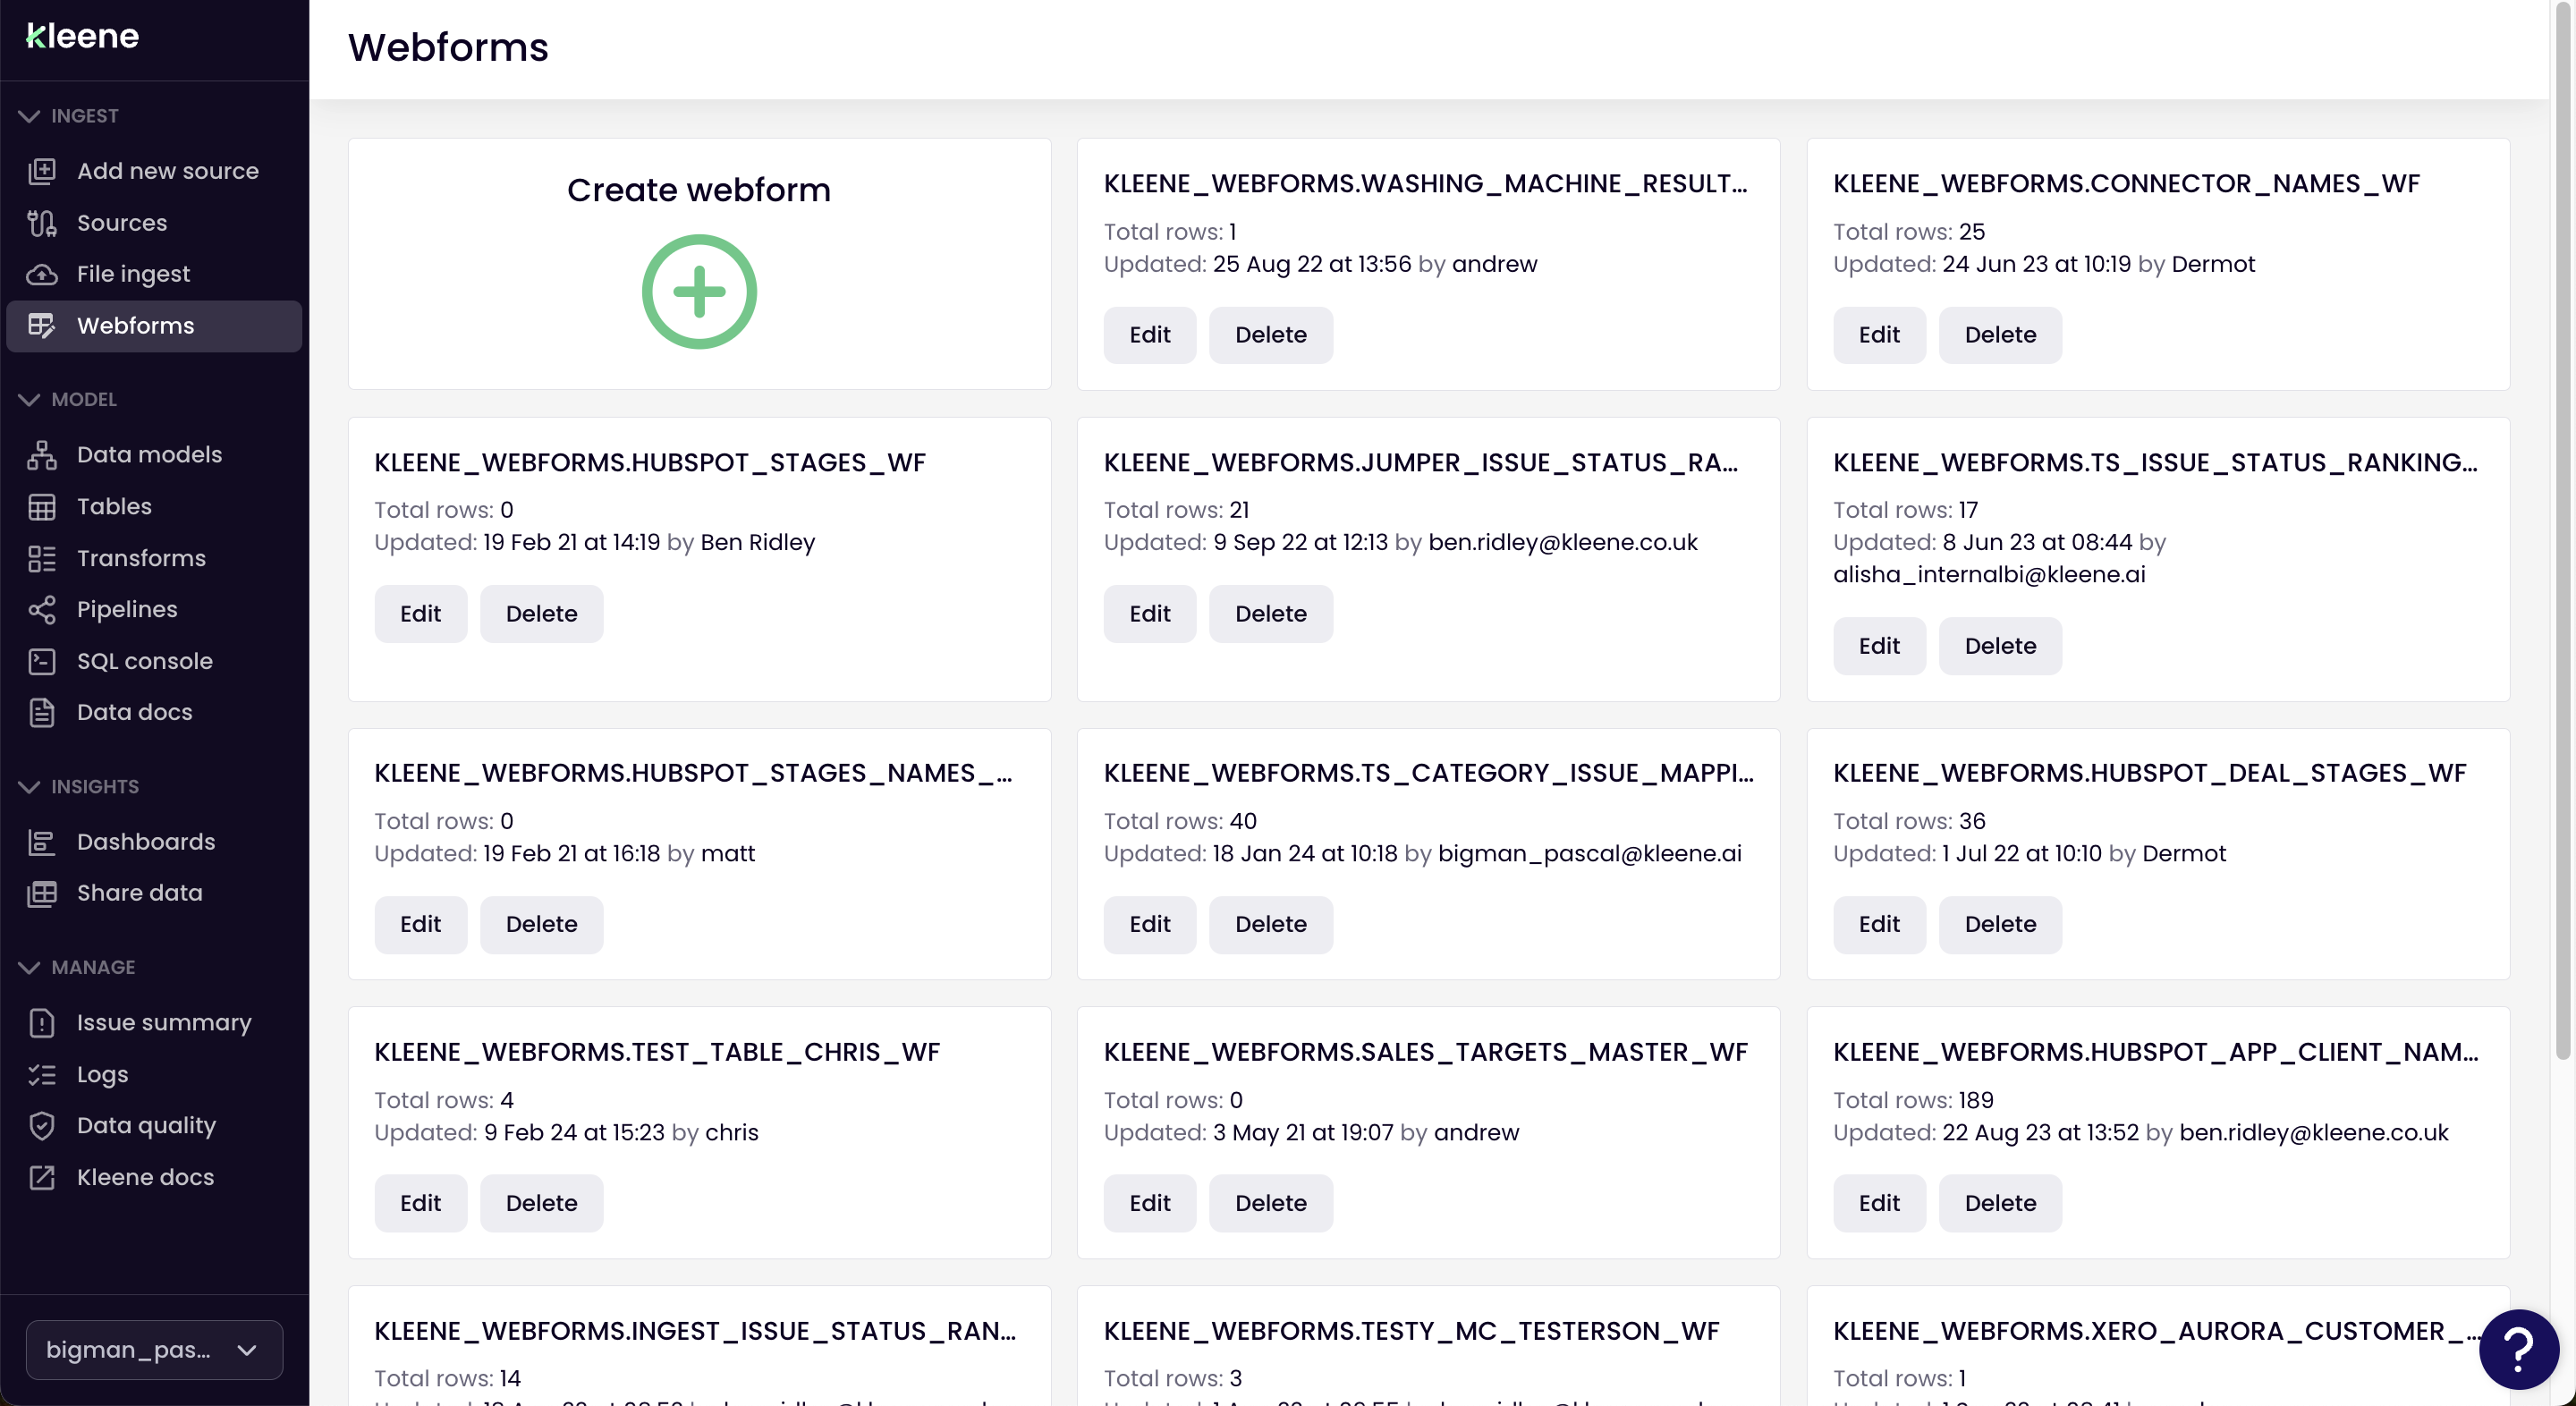
Webforms
Add data directly to tables in the warehouse safety and with a record of the change
Giving users direct access to edit data in the warehouse tables can lead to all sorts of issues. It's much safer to let them add information via a Webform.
Use case
Many of our customers ask other departments to enter information, like monthly financials, on a regular basis. We recommend that you create a new role in Admin Settings with permission to access Webforms only and not the rest of the app.
Schema
Webforms are stored in a schema that's in the main production instance of your warehouse called KLEENE_WEBFORMS. This is created automatically if it doesn't exist when you Create a new table below.
Create webform
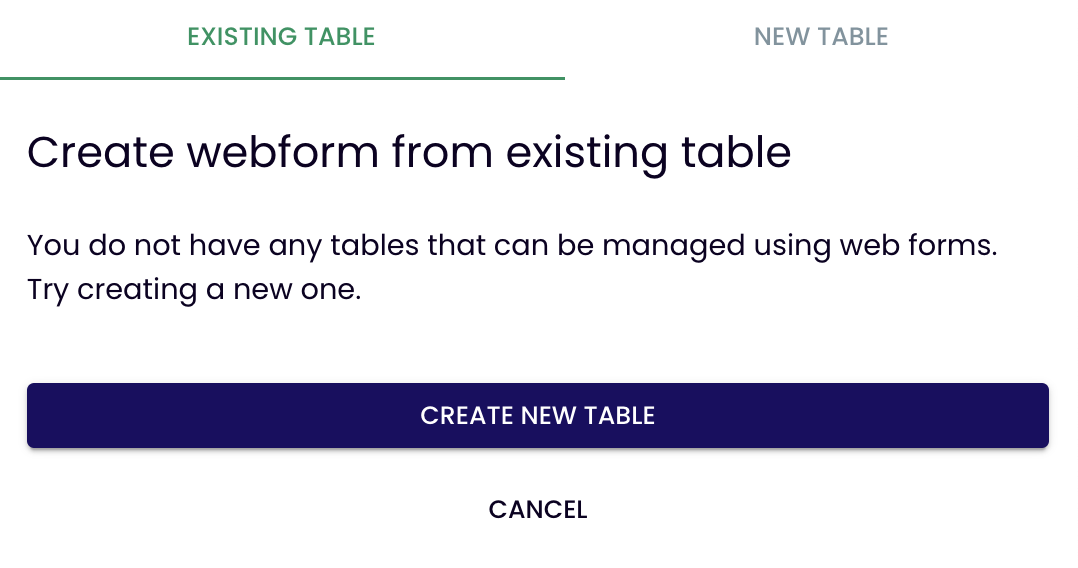
Click Create webform and you have two options -
- Existing table, where append information to a table that is already in the warehouse or
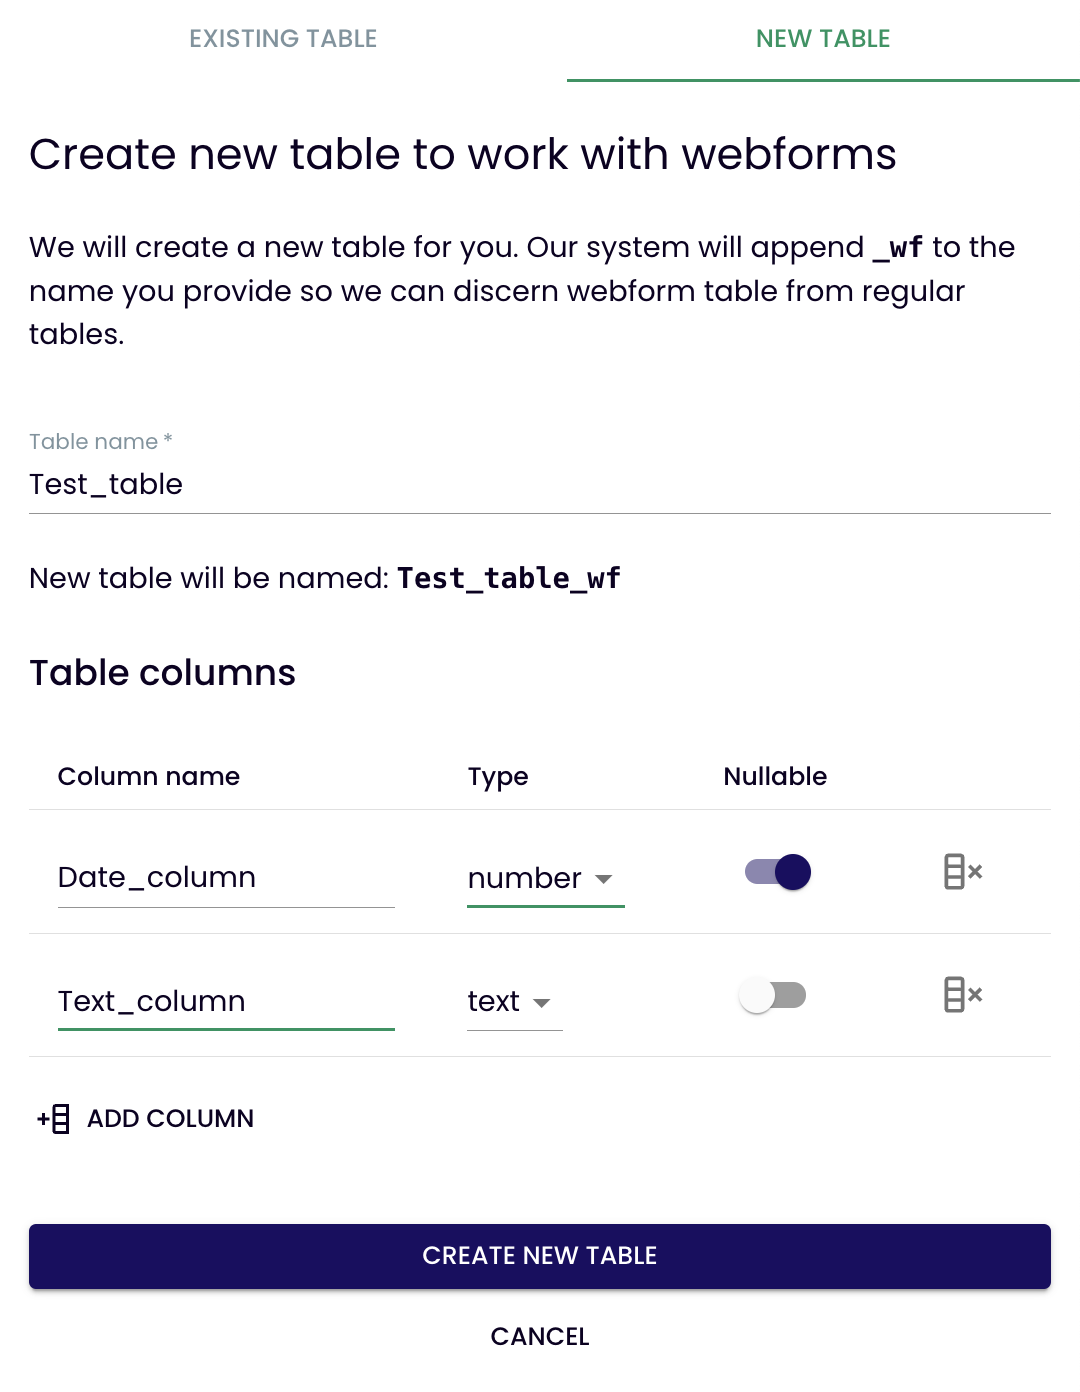
- New Table, where you create a table to add information to
Existing table
You can create new tables in this schema using the SQL Console for example and these tables will appear in the list below.
When you click Create new table...
On Snowflake, we copy the table and add the suffix (_wf) which the webform will then use, the original table remains in the schema.
On Redshift, we rename the table which the suffix (_wf) which the webform then uses.
New table
Simply add information to the form; Name and Columns until you have the structure desired and click Create new table
There are two types of column available,
- Number eg 123 or 1.23
- Text eg "Schema" which also includes Date (YYYY-MM-DD) eg 2024-03-28
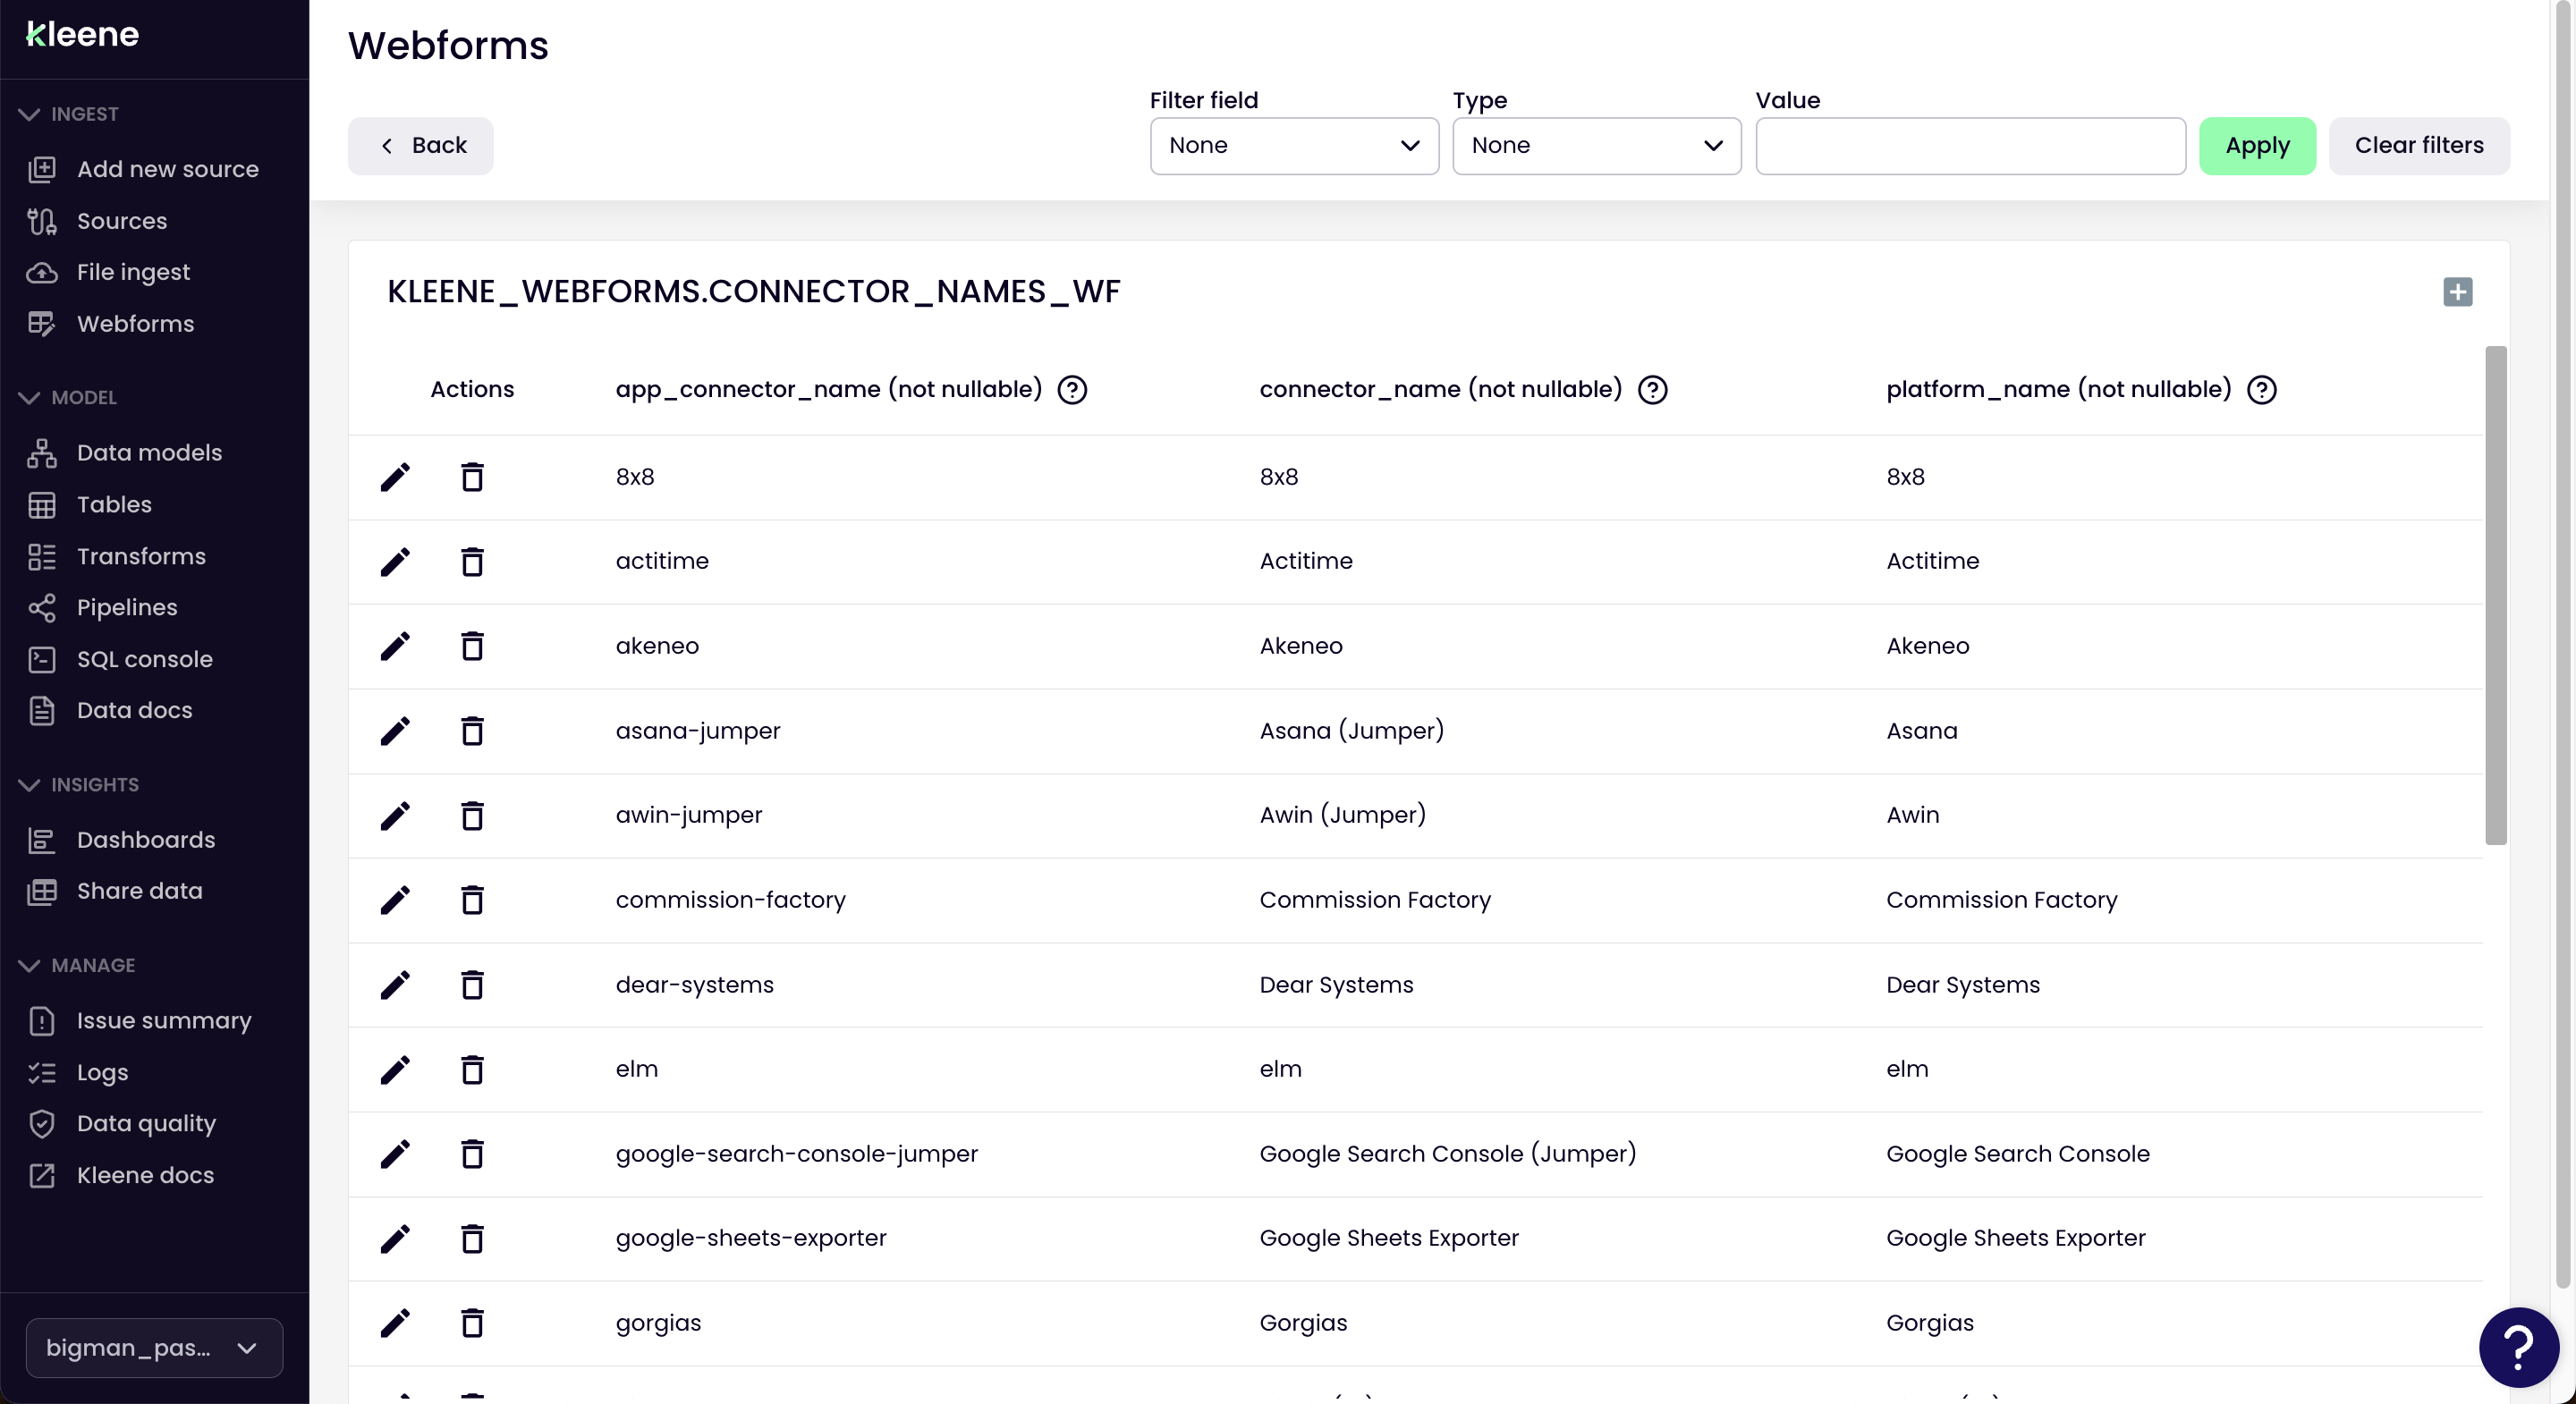
Edit a webform (add data)
Once the webform has been set up, users can click Edit on the card to enter the webform. From here users can add a new line to the table by using the + icon (top right) or edit an existing line by clicking the pencil icon.
Updated 8 months ago