
Create a new extract
You will need to configure a source prior to extracting data via the Kleene app
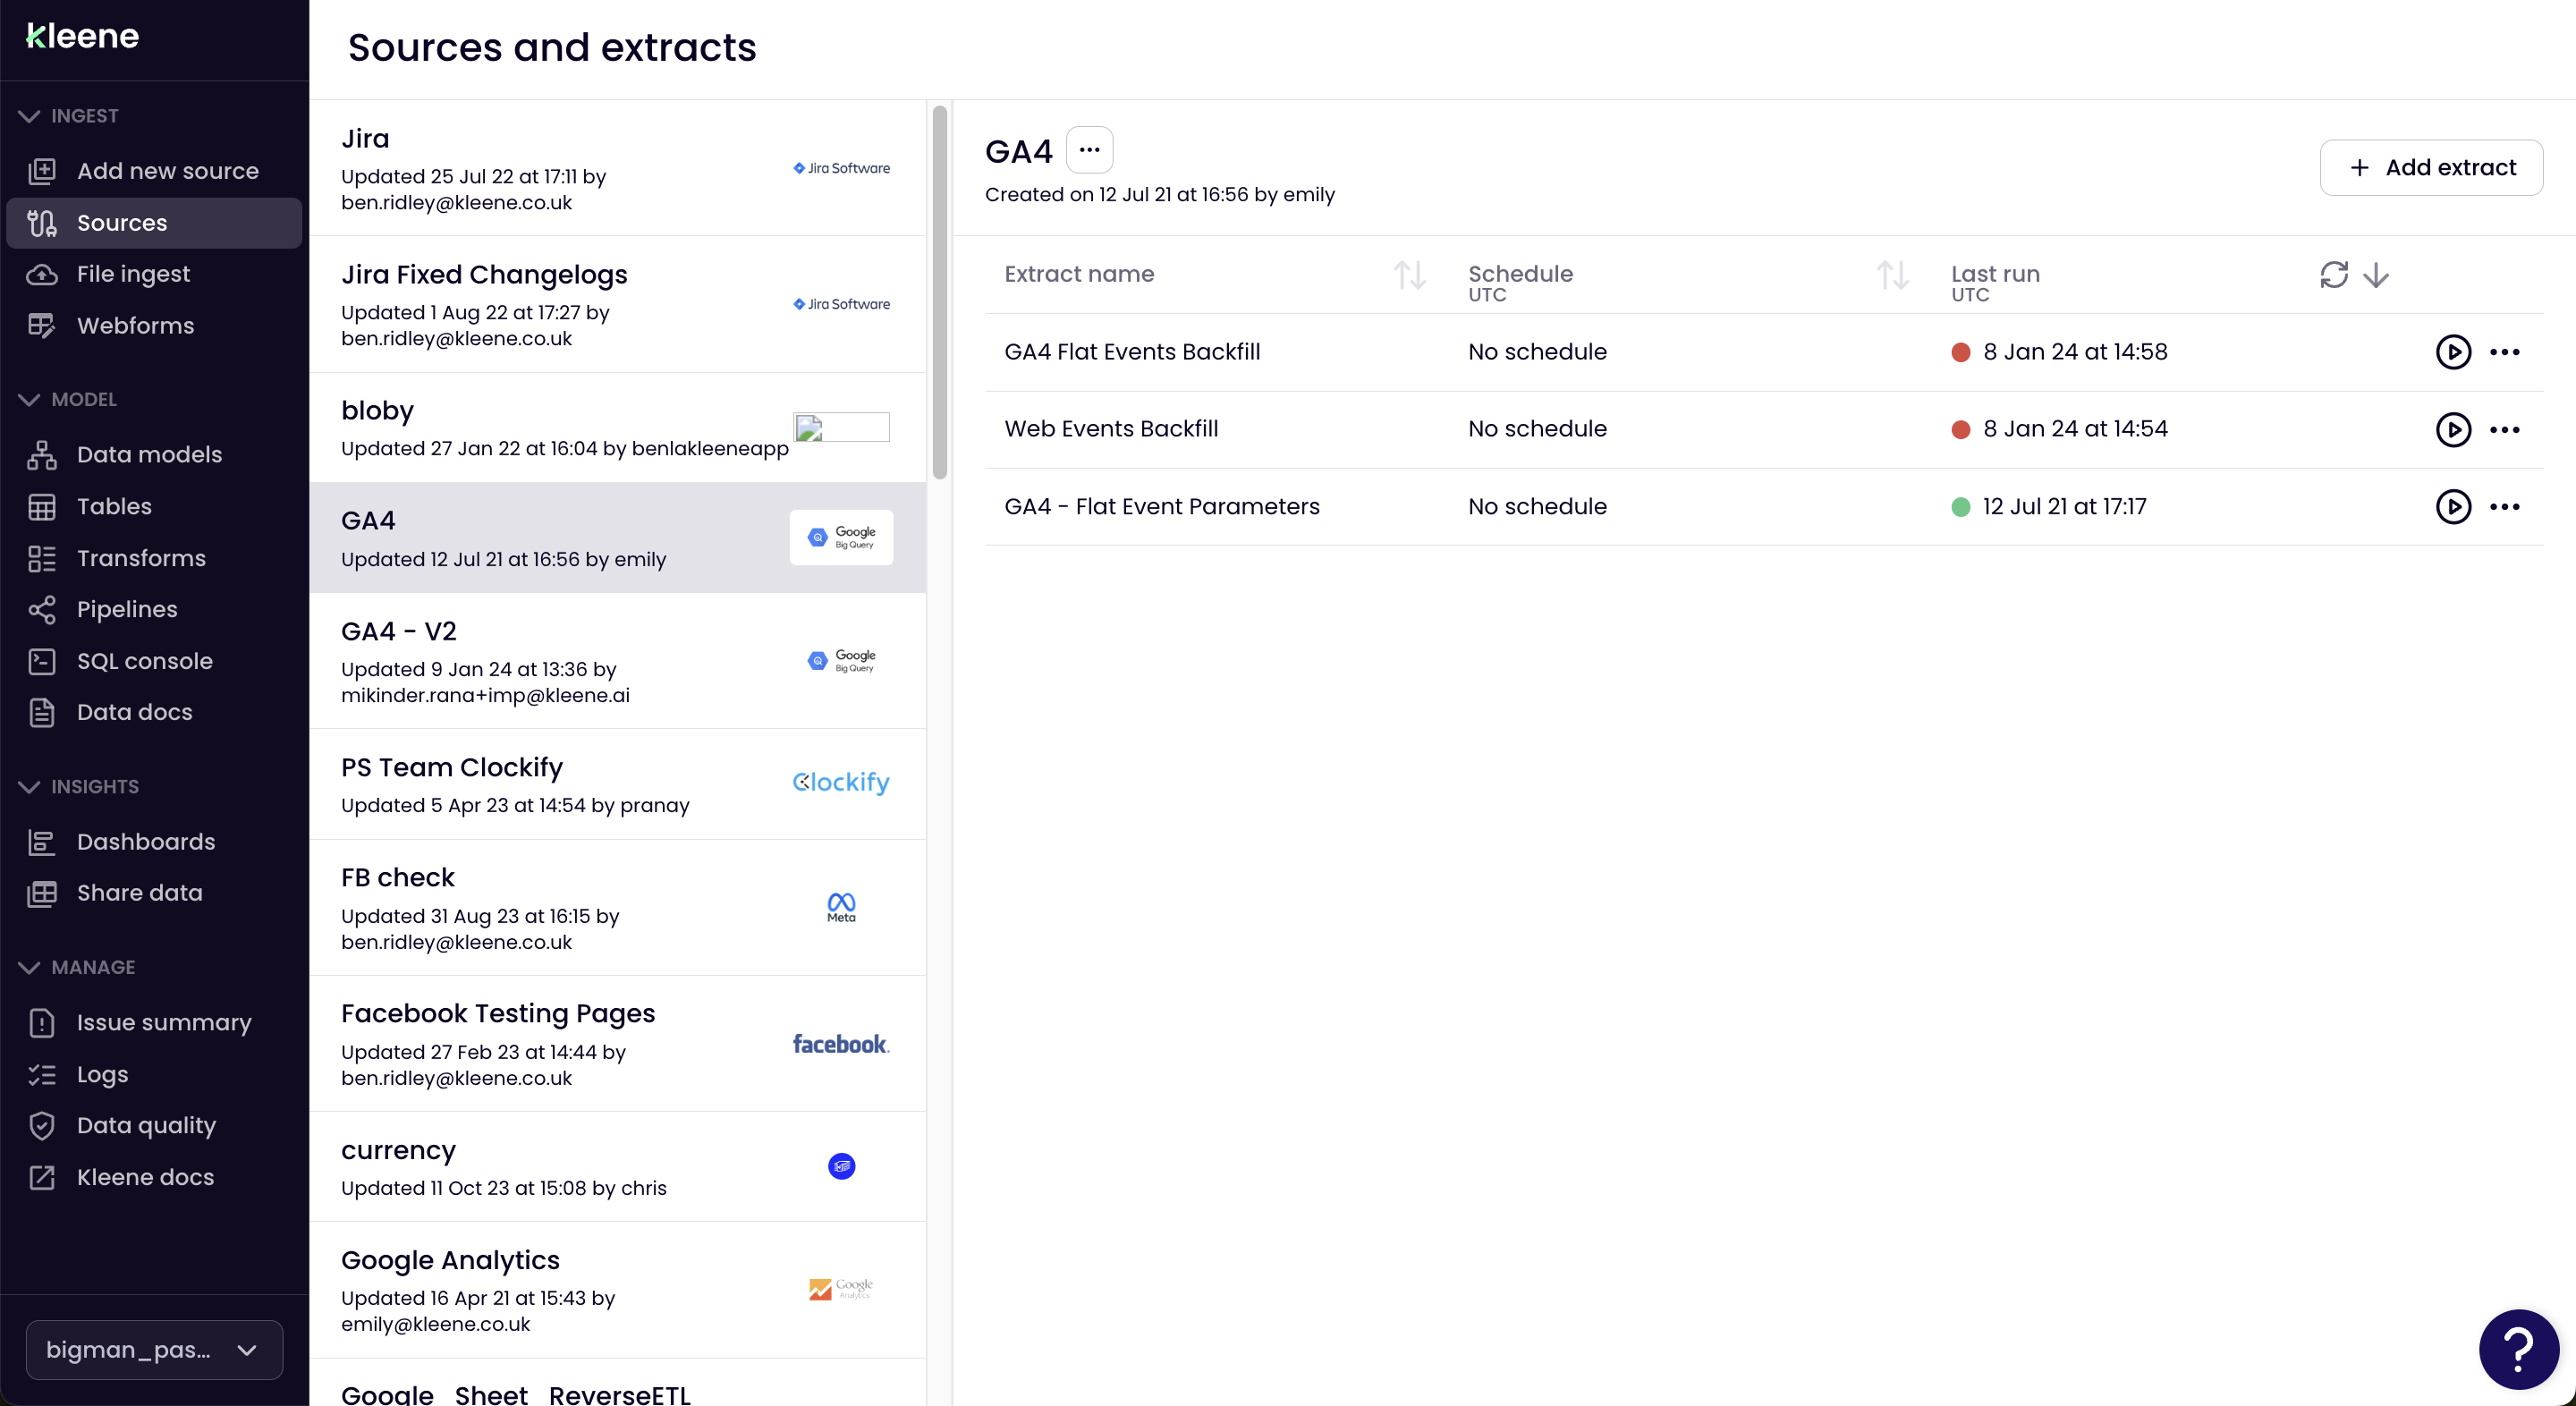
Once your source has been set up, you will want to start extracting your data. Head to Sources and click on the source you set up in the previous step, then click Add extract button.
Here you will be asked for a number of details.
- Extract Name
This is just used for organisation, we suggest naming it based on the data you are looking to extract. E.g. "Campaigns" - Descriptions
Again, this is just for reference, it could be something like: "Daily extract of all Klaviyo campaigns" - Status
Keep this as "active" when first setting up an extract. If you ever have an extract scheduled, however for any reason you do not want it to run on this schedule, you can switch this to "pause". Pausing will not pause or stop any currently running extracts.
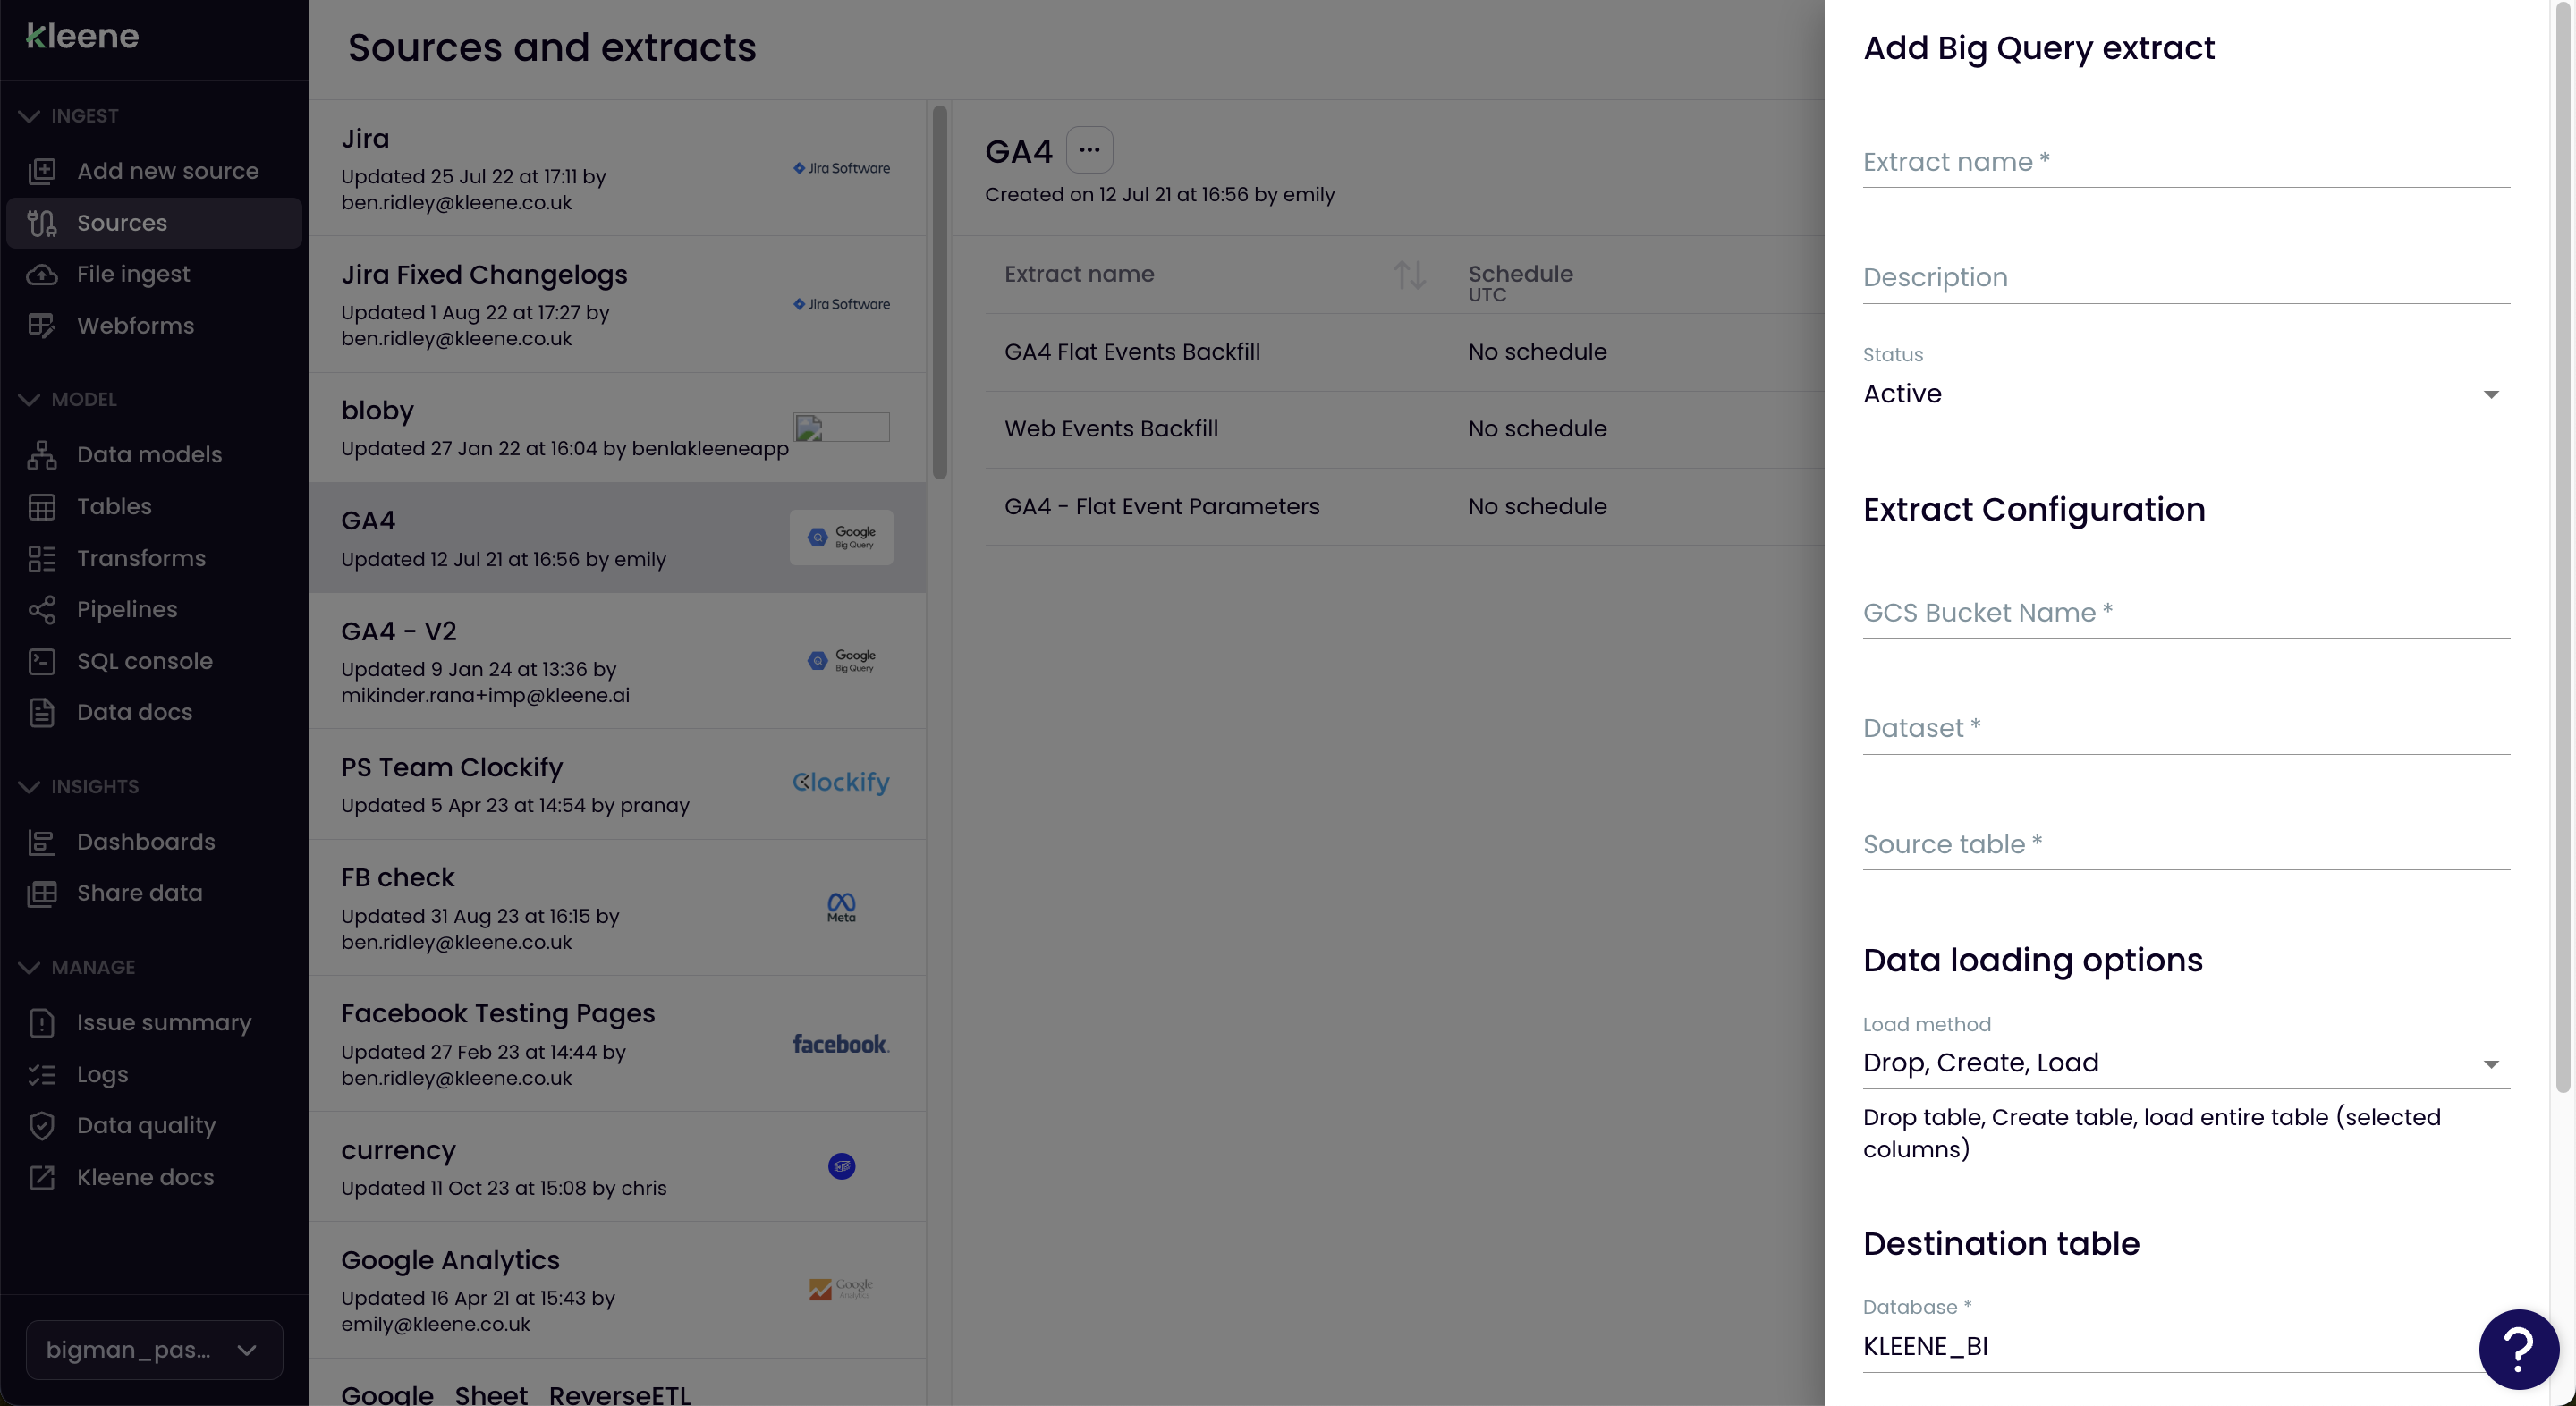
- Report type
There will often be multiple reports to choose from which indicate what data will be pulled. It is likely that you will want to set up an extract for each different report type. For details about the data that is pulled back from each report type, please see the connector-specific documentation, alternatively ask your customer success manager if you need further help. - Load method
Please see load method documentation here under helpful info - Destination table
This indicates the table name which will be filled with the extracted data. This can either be a pre-existing table or a non-existing table. You will also need to define the schema in the data you are referring too.An example of this would be "ingest.klaviyo_campaigns". This example would reference a table called "klaviyo_campaigns" in the "ingest" schema.<schema>.<table_name>
If the table you reference in this field does not exist, then it will be created when the extract first runs.
If the table you are creating does exist, then the data will be added to this table. Please note, if the load method is not "Drop, create, load" then the table definition (columns), must be exactly the same as the extract target data, otherwise, an error will occur.
Once all the above is set up, click Save.
To test the extract, you can immediately run it as a one-off, by clicking the play button to the right.
Next, you will either want to schedule extracts or check the log for details.
Updated 6 months ago
What’s Next