
Setup
After signing up to Kleene, Customer Success will initially set up an account and your designated Admin will need to set up the Warehouse and Filestore.
Your Admin will need to configure the Warehouse and Filestore separately, full documentation on how to do this for the different configurations can be found here.
Connecting your Warehouse and Filestore
As an Admin, click into App settings - Account.
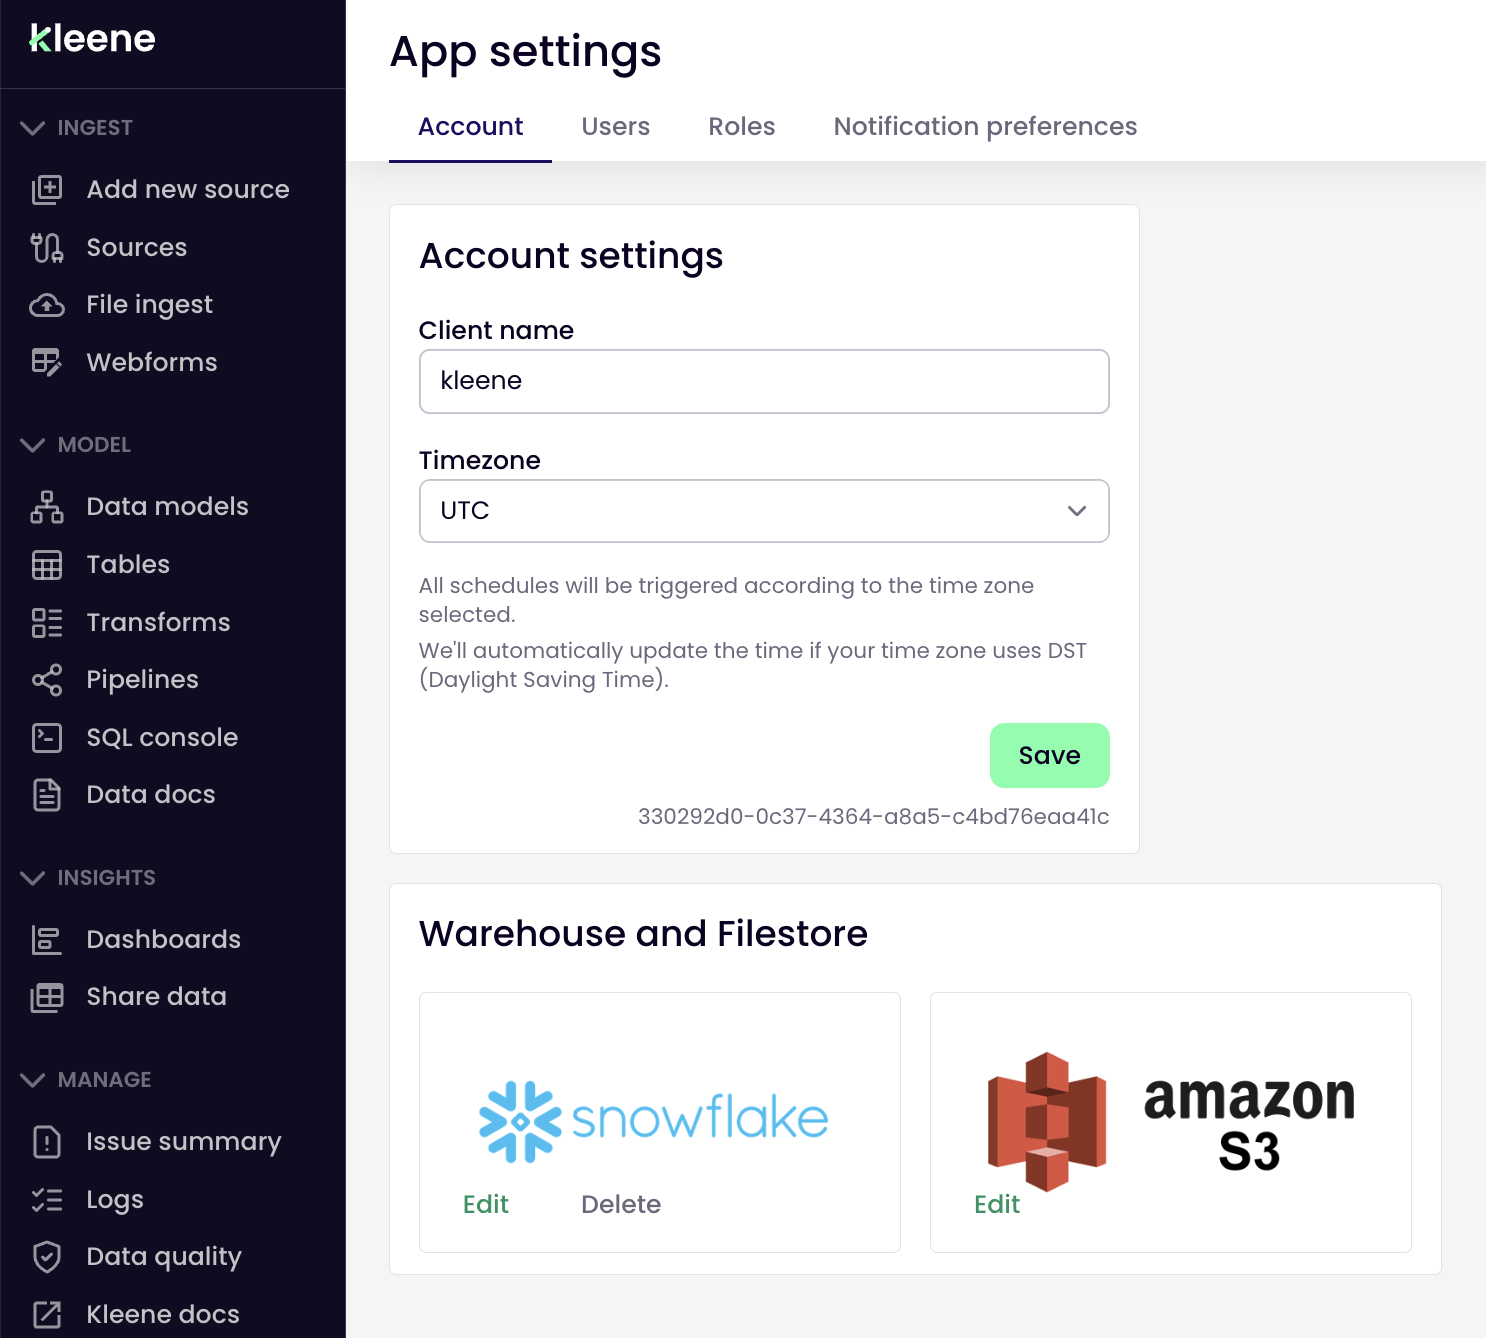
Click Edit and add the relevant credentials for both the warehouse and filestore.
The image above shows what a Snowflake-Amazon S3 configuration would look like. An unsuccessful configuration will result in an error message stating Broken configuration in the warehouse box.
The common cause for this message to appear would be incorrect credentials being used, or if the warehouse is suspended due to billing issues.
Configure Snowflake key pair authentication
Option 1: Manual setup
The steps below are referenced from Snowflake here
Pre-requisites:
- OpenSSL installed
Generate a private key
To start, open a terminal window and generate a private key.
To generate an unencrypted version, use the following command:
openssl genrsa 2048 | openssl pkcs8 -topk8 -inform PEM -out rsa_key.p8 -nocryptTo generate an encrypted version, use the following command, which omits -nocrypt:
openssl genrsa 2048 | openssl pkcs8 -topk8 -v2 des3 -inform PEM -out rsa_key.p8
NoteIt is recommended to generate an encrypted version and securely note the passphrase for later use.
The commands generate a private key in PEM format.
-----BEGIN ENCRYPTED PRIVATE KEY-----
MIIE6T...
-----END ENCRYPTED PRIVATE KEY-----
Generate a public key
From the command line, generate the public key by referencing the private key. The following command assumes the private key is encrypted and contained in the file named rsa_key.p8.
openssl rsa -in rsa_key.p8 -pubout -out rsa_key.pubThe command generates the public key in PEM format.
-----BEGIN PUBLIC KEY-----
MIIBIj...
-----END PUBLIC KEY-----
Insert private key into Kleene
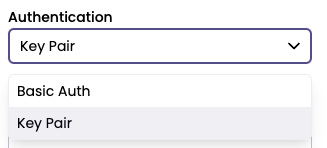
To enter the private key into Kleene App configuration, select Key Pair from the Authentication method dropdown:
To avoid adding or missing any characters to the key, please follow these steps closely:
- Open the key file in a text editor or notepad.
- Select all (Ctrl/Cmd + A).
- Copy (Ctrl/Cmd + C).
- Paste this into the Private Key field (Ctrl/Cmd + V).
- If you have assigned a passphrase, enter this into the provided field as well.
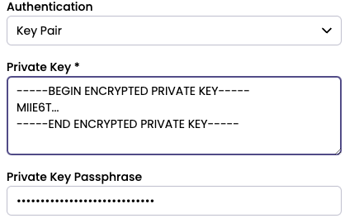
WarningDo not select the key content by dragging over it with cursor, this can alter the key during insertion
Option 2: Automatic setup
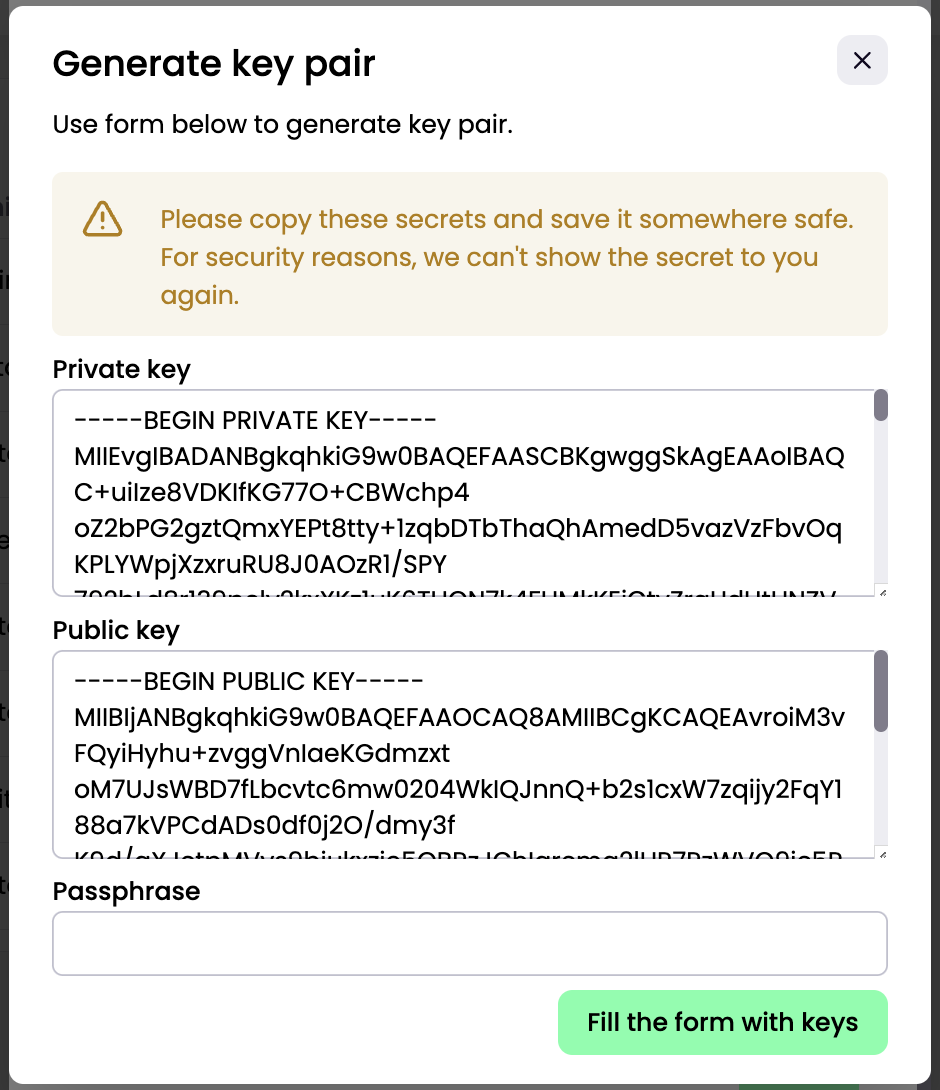
To automate the generation of a new set of keys, users can click Generate key pair which outputs Private and Public keys that can be attached to the desired DB user.
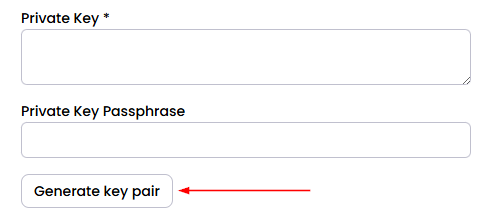
When generating a new key pair, users can enter a passphrase or leave blank. Then click generate to see the Private and Public key values.

This is the only stage where the keys are shown, so copy the values and store them safely.
If a passphrase was entered, this will be auto-filled at this point.
Click Fill the form with keys
Assign the public key to a Snowflake user
Execute an ALTER USER command to assign the public key to a Snowflake user.
ALTER USER example_user SET RSA_PUBLIC_KEY='MIIBIjANBgkqh...';
NoteOnly owners of a user, or users with the
SECURITYADMINrole or higher can alter a user. For more information, see Overview of Access Control and GRANT OWNERSHIPExclude the public key delimiters in the SQL statement.
Set Up Extract Warehouse
This feature is only available to Snowflake users
To use a dedicated warehouse for your extracts, you must ensure the associated Snowflake role has the correct permissions to manage target tables. Using a dedicated warehouse for extracts means that all data ingestion tasks will be redirected to that specific warehouse, bypassing your default configuration.
Permissions Setup
When creating a new role for a new warehouse the role must have ownership of the destination tables. This is critical because Drop, Create, Load method requires Snowflake Ownership to perform a DROP command.
The following commands represent the minimum privileges required when working with an extract-specific warehouse that is assigned to a role different from the one already configured for transformations.
The following permission script is based on assumption
- The extract specific warehouse is named EXTRACT_WAREHOUSE
- The new role is named EXTRACTS_ROLE
- The existing role is named TRANSFORMS_ROLE
- All extracts will be landing in schema INGEST of My_DB database
-- Run as a role that can manage grants / transfer ownership.
-- ACCOUNTADMIN is the simplest option if that is how your account is administered.
USE ROLE ACCOUNTADMIN;

GRANT USAGE ON WAREHOUSE EXTRACT_WAREHOUSE TO ROLE EXTRACTS_ROLE;

-- Ownership is needed so that extracts are able to drop/replace
-- tables in ingest schema
GRANT OWNERSHIP ON ALL TABLES IN SCHEMA My_DB.INGEST TO ROLE EXTRACTS_ROLE COPY CURRENT GRANTS;
GRANT OWNERSHIP ON FUTURE TABLES IN SCHEMA My_DB.INGESTTO ROLE EXTRACTS_ROLE;
GRANT USAGE ON DATABASE My_DB TO ROLE EXTRACTS_ROLE;
GRANT USAGE, CREATE TABLE ON SCHEMA My_DB.INGEST TO ROLE EXTRACTS_ROLE;
GRANT USAGE ON SCHEMA My_DB.PUBLIC TO ROLE EXTRACTS_ROLE;
GRANT READ, WRITE, USAGE ON ALL STAGES IN SCHEMA My_DB.PUBLIC TO ROLE EXTRACTS_ROLE;

-- the following are needed so that transforms are
-- able to operate on existing and future tables
-- within the ingest schema
GRANT SELECT, INSERT, UPDATE, DELETE, TRUNCATE ON FUTURE TABLES IN SCHEMA My_DB.INGEST TO ROLE TRANSFORMS_ROLE;
GRANT SELECT, INSERT, UPDATE, DELETE, TRUNCATE ON ALL TABLES IN SCHEMA My_DB.INGEST TO ROLE TRANSFORMS_ROLE;
Enabling Extract Warehouse in Kleene
- Navigate to your source settings and check the Use separate warehouse for extracts box.

- Enter the relevant credentials for the new warehouse.
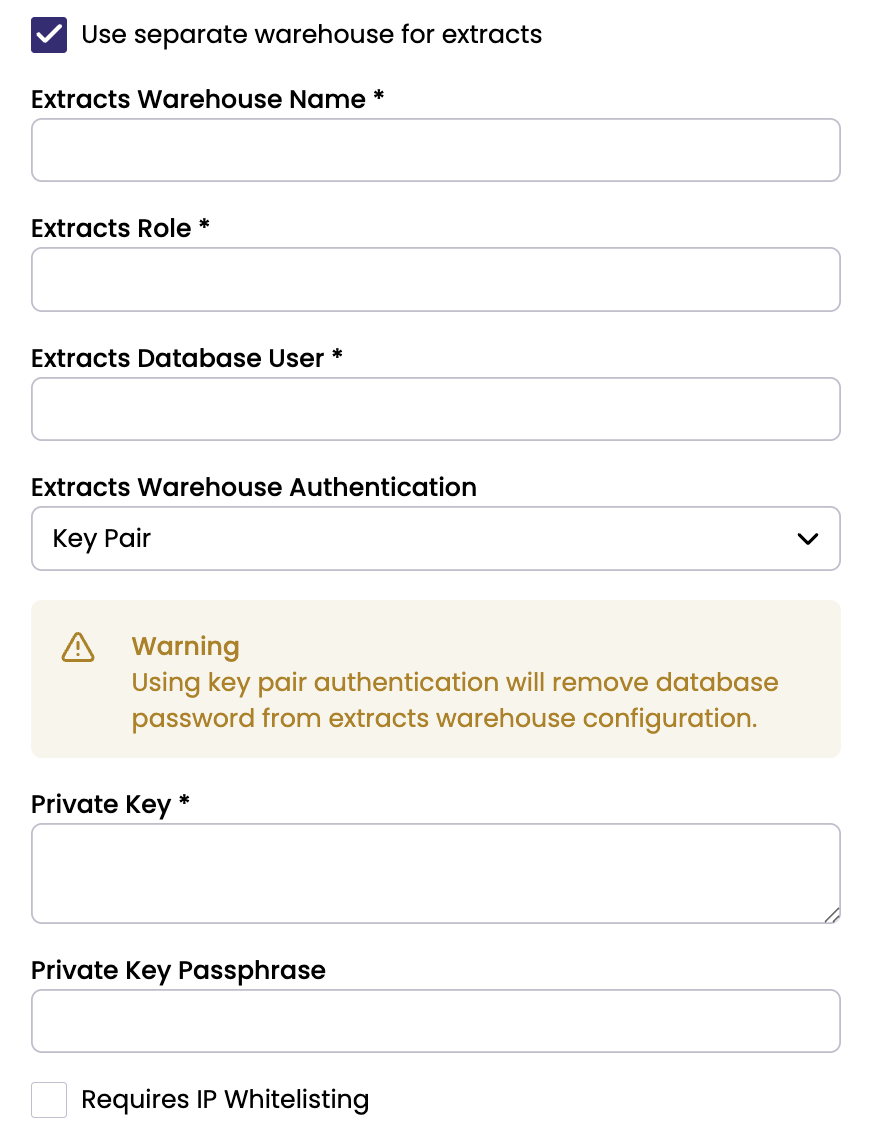
- Click Save.