
SQL Generator
Generating your SQL transforms through a no-code interface.
Introduction
The SQL generator is a no-code interface that enables you to generate a SELECT statement on a specified table. The statement only contains the fields chosen. The SQL generator now and also supports casting and aliasing the, it is particularly effective when you need to access data nested within JSON objects.
LimitationsSnowflake Only
Currently the Visual SQL Generator works with Snowflake, but Redshift and BigQuery will be supported in due course.SQL Editing Not Supported
It is currently not possible to edit the SQL within the Visual SQL Generator. Please generate the SQL then copy it into the console and make any manual adjustments there.Joins Not Supported
It is currently only possible to select a single input table. Joins and Unions between multiple input tables are not currently supported in the SQL Generator.
Accessing the SQL generator
The SQL Generator can be accessed from the SQL console or from within a transform group in the Transforms section. Clicking on the SQL Generator will open a window fullscreen that will overlay the page you are currently on.
Access from the SQL Console:

Access from a transform group:

Choosing an input table
Upon opening the SQL Generator you are prompted to choose an input table. The table is chosen from the database structure displayed on the left side of the page. Only fields from the chosen input table can be used.

Field Selection
After choosing an input table you are prompted to select the fields you want the SELECT statement to contain. All the columns of the input table are displayed on the left-hand side along with their data type. Simply check the boxes of the fields you wish to include. To help find particular fields you can use the search filter and alphabetical sorting.
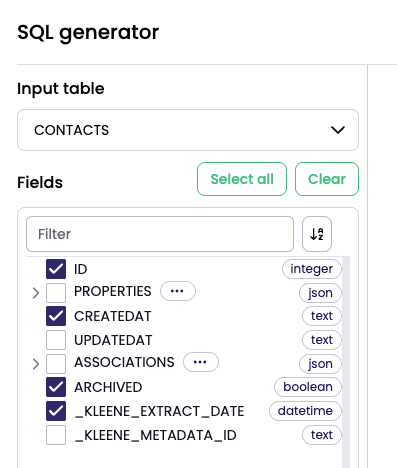
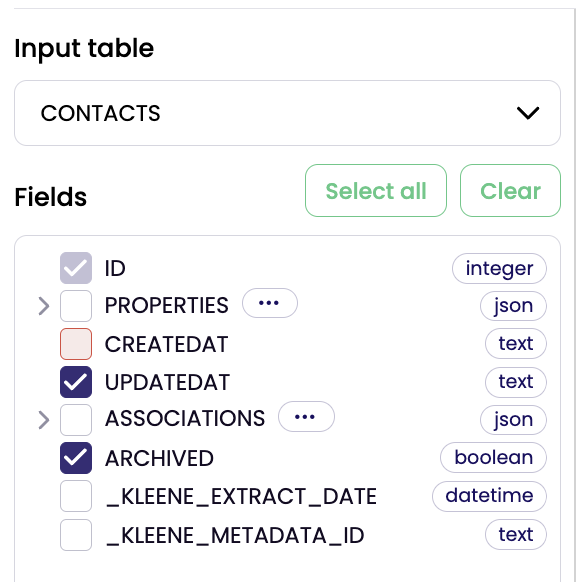
If you are unsure as to whether you need to include a specific field, hover over it and you will see a preview of up to 5 example values. If there are no values displayed in the preview for a field, it means this field was null in every row of the 10000 row sample taken from the input table. Once you have selected all the fields you wish to include click Apply selection. It is possible at any time to change the fields selected by checking and unchecking the checkboxes and clicking Apply selection, any existing selections are faded and any fields that have been deselected have their checkbox marked red.
Selected Columns
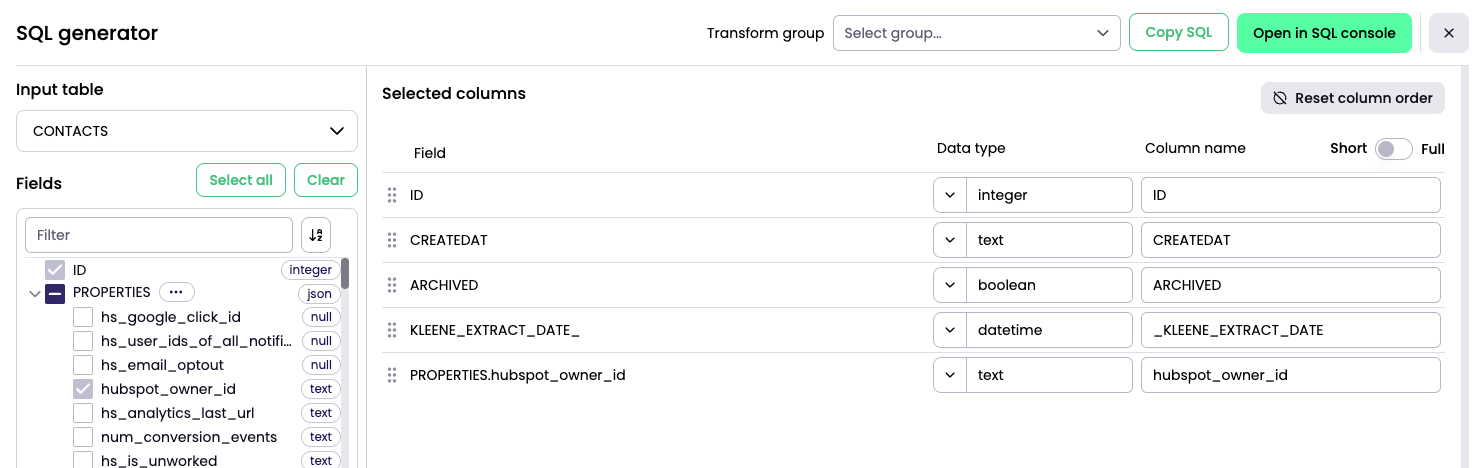
The fields selected appear in theSelected columns section with their data type and specified column name.
Column Order
Columns in the Selected column are ordered in the sequence the corresponding fields were selected. To move a column to a different position, click on the column's drag handle and drag it into a new position. If you wish to reorder multiple columns, hold Ctrl/Cmd and click on the relevant field names then use the drag handle to re-position all selected columns.
Aliasing
Columns appear with the same column name as the corresponding field, but this name can be changed. To do this enter the new name in the column name input field and the column will be aliased to the new name. Columns from the input table which are nested within a JSON objects will by default be given the name of the key, but by switching the toggle next to column name from short to full, the column names will be set to the full path, so hubspot_owner_id would become PROPERTIES_hubspot_owner_id.
Data Type
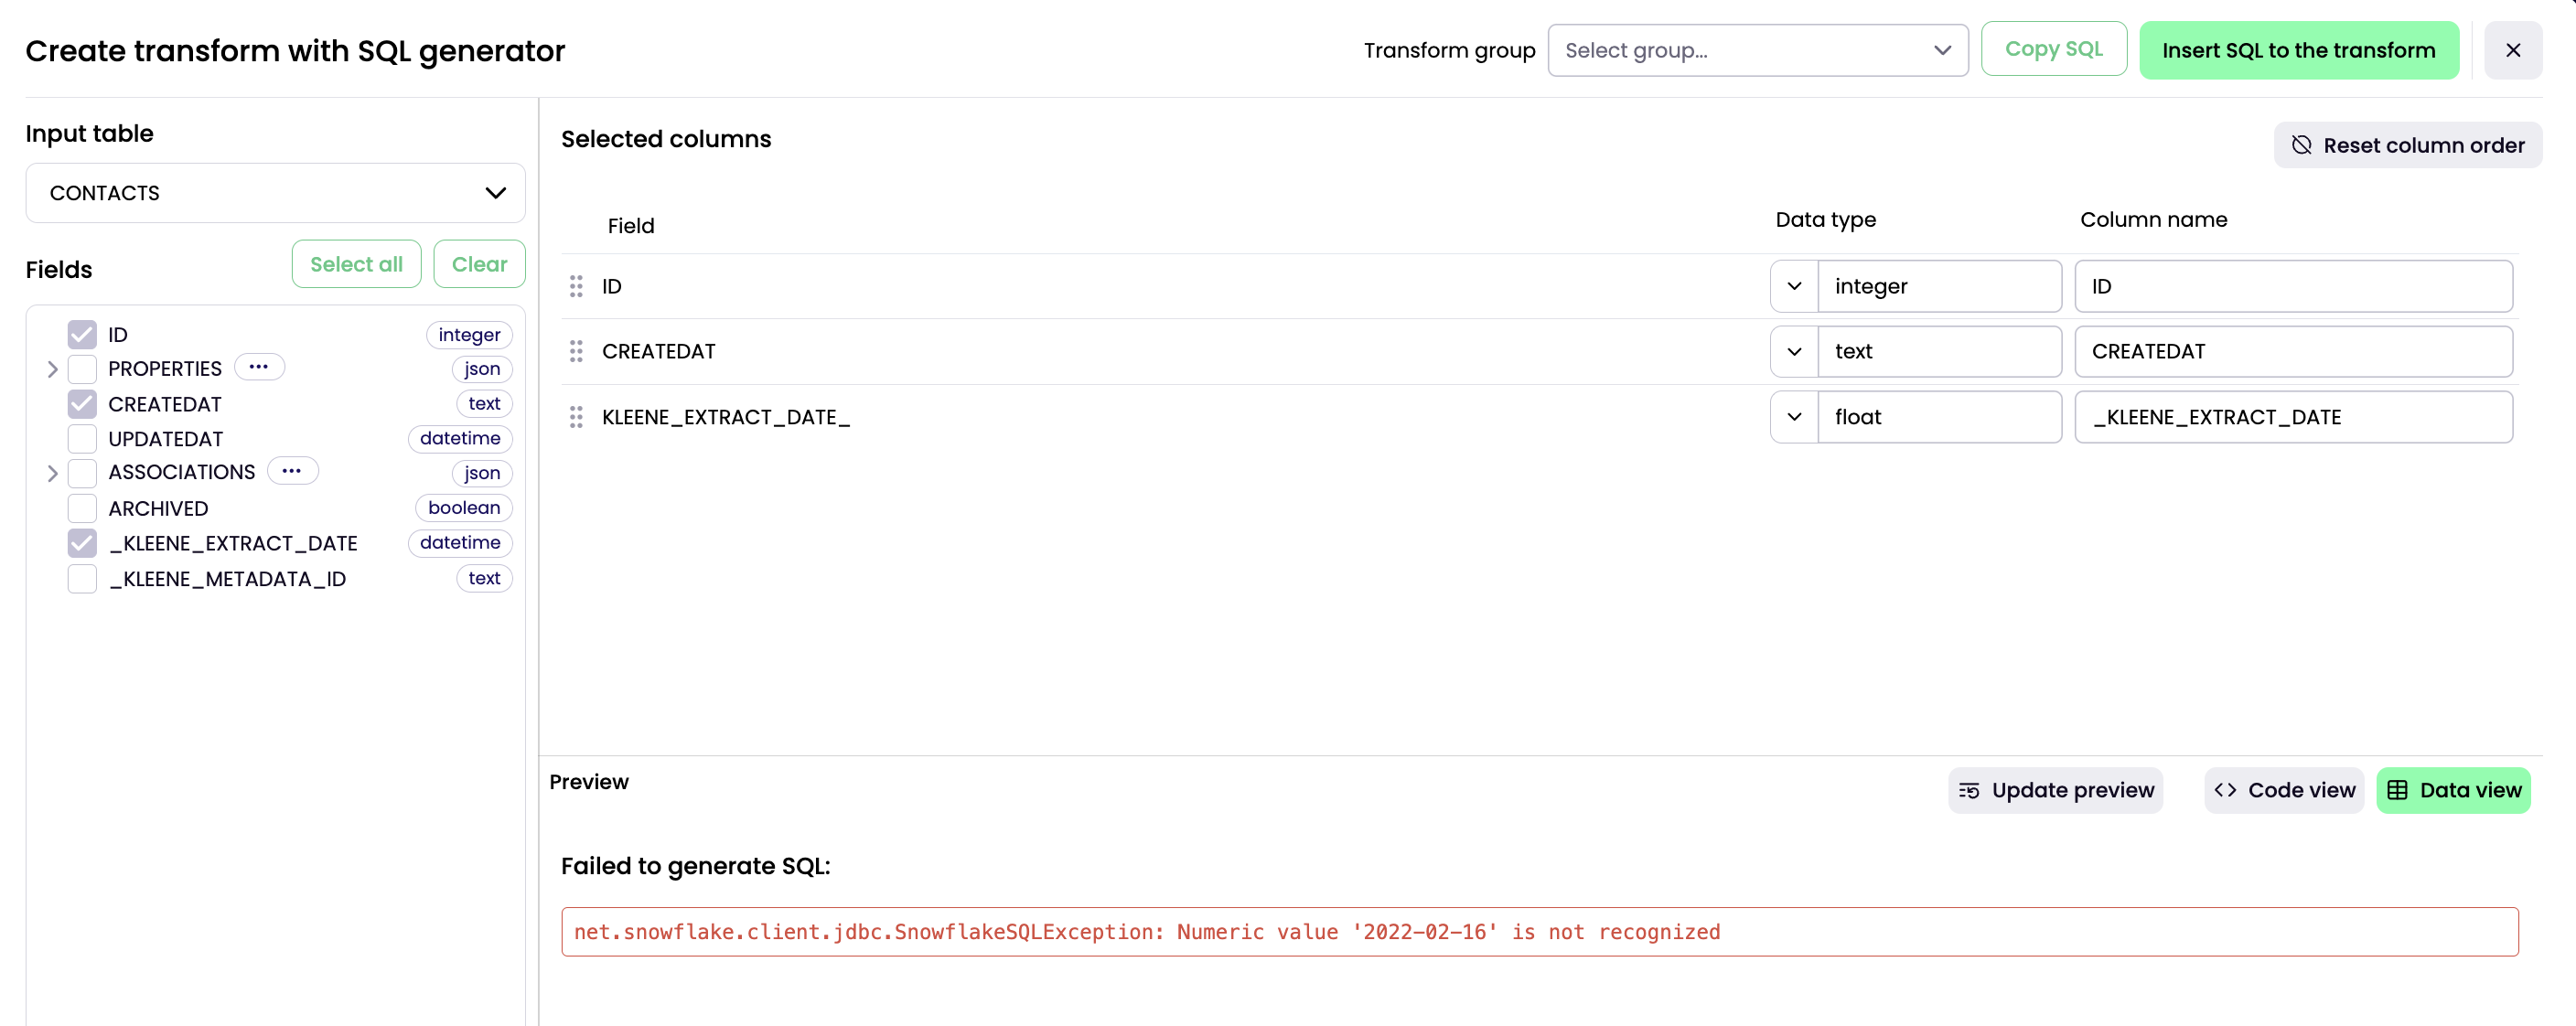
Columns appear with the same data type as the corresponding field, but this data type can be changed. To do this choose one of the options in the data type dropdown and the column will be casted to the chosen data type. If you cannot find the data type you need then type in the data type you wish to cast the column as. Upon changing a column's data type the SQL that is generated is executed. If there is an error, it is displayed in the preview section as shown below, this was triggered by attempting to cast _KLEENE_EXTRACT_DATE to a data type of float.
Preview
Once the field selection has been applied the generated SQL can be seen in the code view. To see a preview of the table the SQL ouputs when executed click to switch to Data view. Toggling between the two views does not execute the SQL. In order to execute the SQL again click Update preview.
JSON Object and Array Fields
JSON objects
If a field contains text formatted as a JSON object then the data type icon will show jsonas is the case forPROPERTIES and ASSOCIATIONSin the example above. To see the fields within the JSON object click on the caret to the left of the checkbox. Fields within JSON objects can be selected in just the same way as columns in the input table. To select all fields within a JSON object simply click on the checkbox by the JSON object and you will see all fields will be selected (even if there is multiple layers of nesting). If it is necessary to persist the JSON object in the SELECT statement then click the ellipsis next to the JSON object and click Include as stringified JSON object.
Arrays
If a field contains text formatted as an array then the data type icon will show array. If the key of an Array is chosen a LATERAL FLATTEN command is included, the granularity of the table will be increased and the chosen key will be displayed.
Selecting Keys from ArraysSelecting keys from within an Array increases the level of granularity of the output table to the level of granularity of the array object. If the input table has 100 rows and row contains an array with 5 objects and one or more keys from the array is selected then the output table will have 500 rows.
Using the Generated SQL
Once your SQL has been generated you can choose to either COPY SQL this will copy all the SQL to your clipboard so it can be pasted wherever you like or INSERT SQL TO THE TRANSFORM this will take you to a new Transform with the generated SQL populated.
Updated 8 months ago