Google Cloud Platform (GCP)
Prerequisites
You will need a Google account in order to access GCP. If you do not have one please create one here
Set up
Creating an Organisation
- Follow this link to GCP here
- Start your free trial and add your billing details. Failing to add billing details before the end of the free trial will cause you to be cut off and the following setup will have to be redone. We therefore recommend adding billing details as soon as you start the trial.
- Create an organisation for your business within your account. Step by step instructions for this can be found here.
Creating a Project
- Once you have created an organisation, you need to create a project and name it please use the following naming convention: '
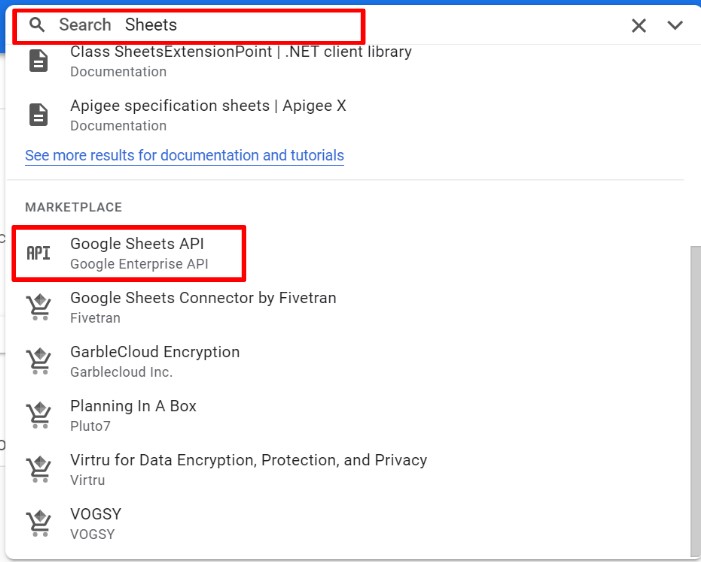
your_org_name-kleene'. Step by step instructions on creating a project can be found here - You then need to enable the APIs of the platforms you require data for the following example demonstrates the process for Google Sheets:
- Search ‘Google Sheets API’ using the top banner search box

- Click the 'ENABLE' on the appropriate API

Creating a Service Account
- You now need to generate service account credentials as all Google connectors require this for authentication. To do this navigate to 'IAM & Admin' > 'Service Accounts'.
- Create a service account (see image below). Then follow the steps through to create a service account. Give the account an appropriate name such as 'kleene_service'.
Once you have generated the account, grant owner access to the project you set up above. You can also grant specific users access to this service account for monitoring, however this is optional.

- Once the account has been created navigate to Actions > Manage Keys > Add Key > Create New Key. Then select JSON and confirm. Save this key in a secure local environment such as a password vault.
You can only ever create a service account key file once so when you generate them, remember to store it in a secure password vault.
- Navigate to IAM & Admin > IAM click 'Add'. Then add the client email from the Service Account Key File and check the role is set to 'Owner'
Creating a Bucket
- A bucket now needs to be created in order to land data in the Kleene app. From the main menu, navigate to Cloud Storage. Create a new bucket and give it a unique name such as kleene_bucket-1. Please see Google instruction for details on naming requirements. Set the location (single region) so that it matches the location of the data set you're transferring.
Ensure the bucket location matches the location of the data you are transferring
- You now need to choose a default storage class the data within your bucket. For more information on storage classes read this Google documentation. The default storage class is assigned by default to all objects uploaded to the bucket. We recommend using Standard.
The Monthly cost estimate panel in the right pane estimates the bucket's monthly costs based on your selected storage class and location, as well as your expected data size and operations.
- You now need to modify the access control for your bucket. Since our app sits outside the Google network, here you'll need to make the bucket public by selected 'fine-grained access' > 'how to protect object data' > none.
Next Steps
You are now ready to start landing data in you BigQuery for instructions on how to do this for various data sources use the instructions below:
Updated about 1 month ago
