Creating an Azure Blob container
Create an empty Azure Blob container to get set up with the kleene app.
Prerequisites
You must have access you your Azure portal
Steps
Log in to your Microsoft Azure portal and navigate inside Storage accounts.

The first step is to create a storage account by pressing on the create button with the plus sign.

This will take you to the following screen: Give appropriate names for the resource group and the storage account name. It is vital that the region matches your Snowflake account region. This can be found on the URL of the snowflake account:
N.B - Currently, Snowflake only supports Azure in West-Europe (Netherlands) and Switzerland North (Zurich).
(https://XXXX.us-east-1.snowflakecomputing.com)
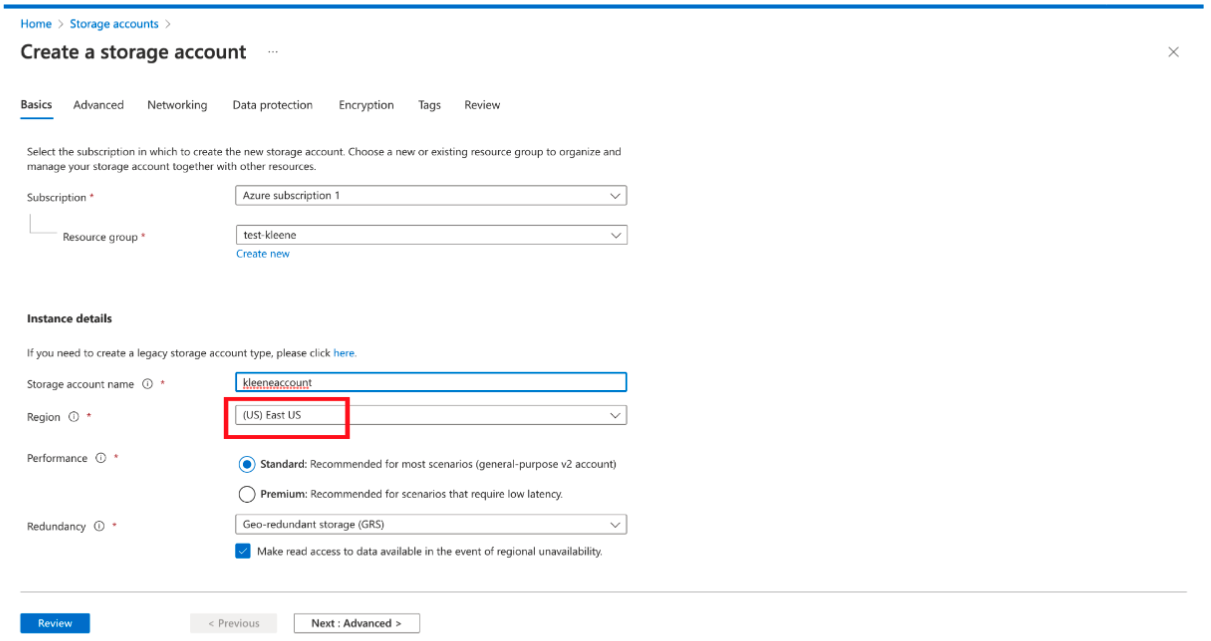
Leave everything else as default, press review and then create.
Once the storage account has been created, navigate inside of it. Now you need to make changes to Networking and Shared access signature.
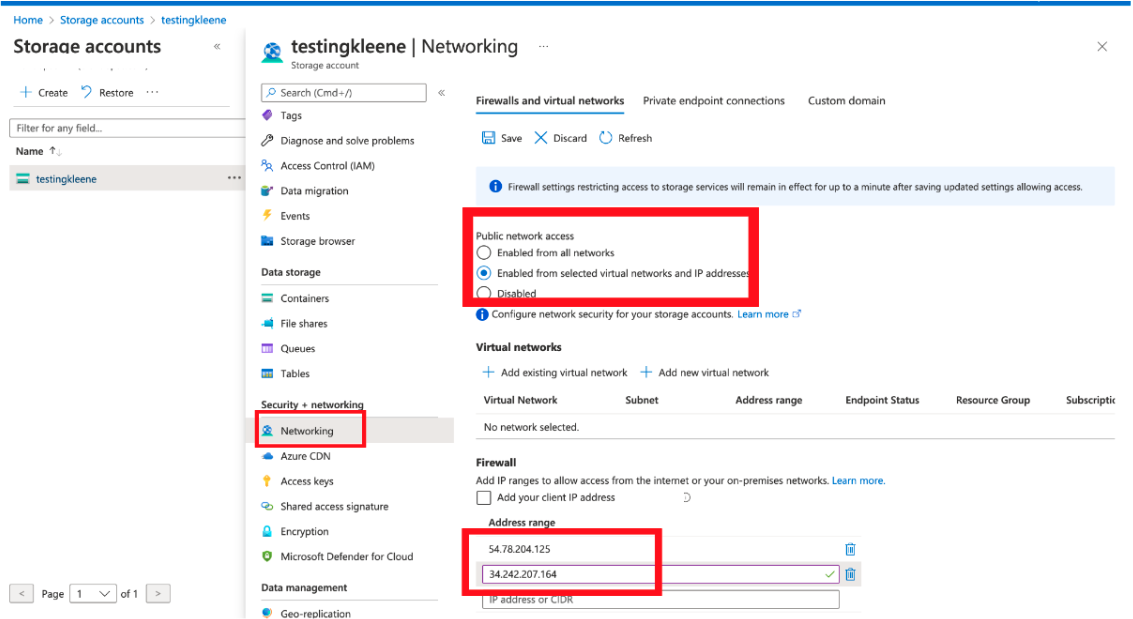
Navigate inside of Networking and ensure that under ‘Public network access’: Enabled from selected virtual networks and IP addresses is selected.
Under firewall add the following IP addresses:
54.78.204.135
34.242.207.164
Common error: Make sure that you are inside of the Networking page as seen above. If you are inside the Containers section under Data Storage this will NOT work.
Scroll to the top and make sure to save before continuing.
Next navigate to Shared access signature.
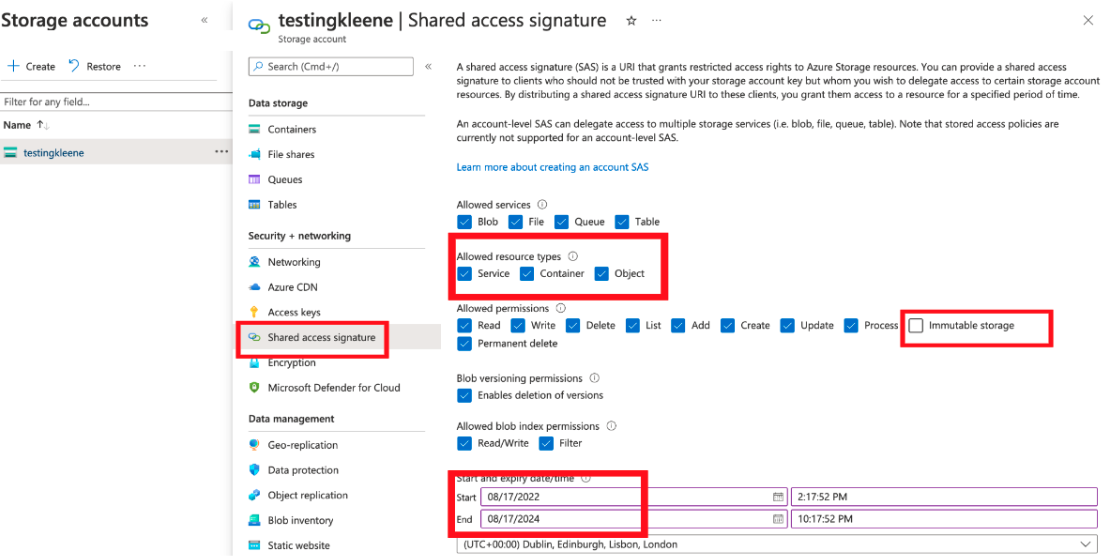
Make sure all options are ticked under ‘Allowed resource types’. Make sure that under ‘Allowed permissions’ Immutable Storage is unticked.
The start and expiry date default to a 24-hour period, so the expiry date needs to be edited. We recommend that it is at least 2 years in the future.
Once you have selected these scroll down press the Generate SAS and connection string.
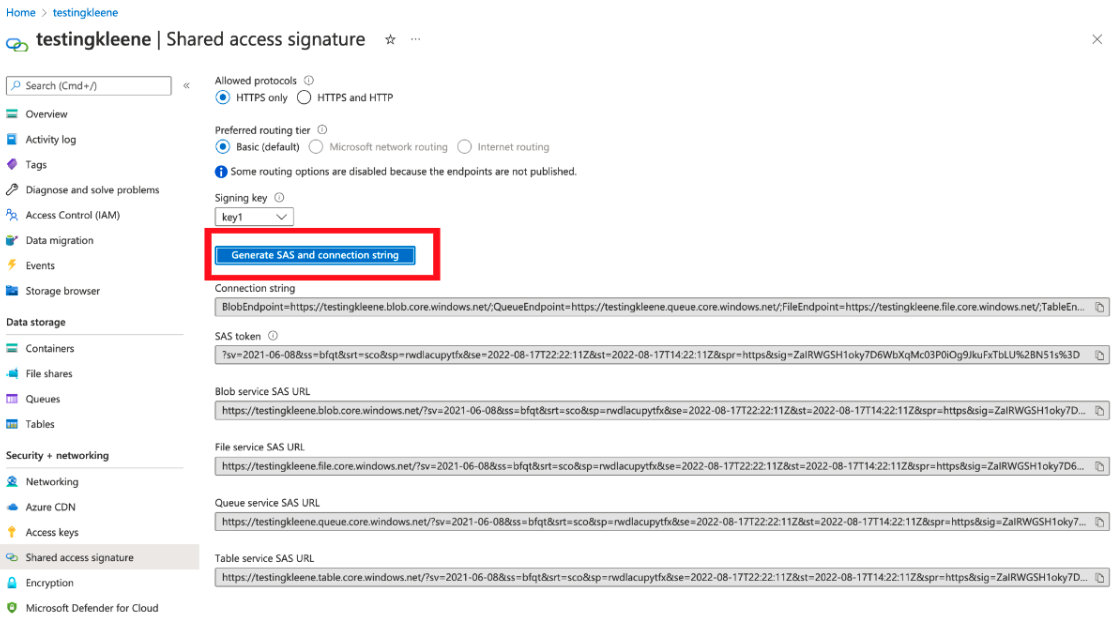
Attached here is an article for further instruction on generating the SAS token.
Store the SAS token securely.
Next navigate back to the container and click on the three dots on the right hand side and then Container properties.
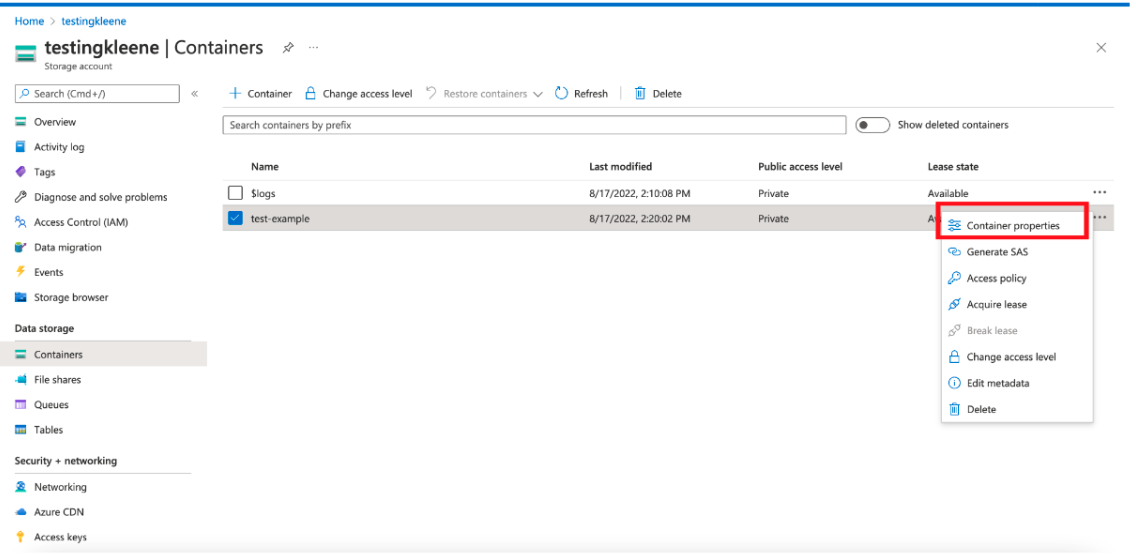
Here you can obtain the URL.

Note that when setting up in Kleene you want to remove the protocol (https:// in this case) and remove any forward slash at the end if there is one.
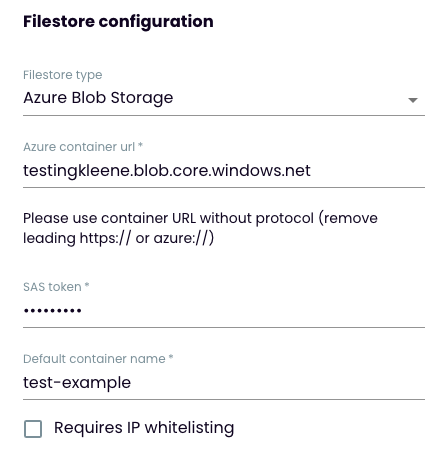
Inside the Kleene app make sure that Azure Blob Storage is selected as the Filestore type.
The container url in this instance is testingkleene.blob.core.windows.net
The SAS token is the one saved securely from before.
The container name must exactly match the container name in Azure, note: this is case sensitive.
The ‘Requires IP whitelisting’ need to be ticked if it is a firewalled blob stores.
Press save.
Extra Steps if your Azure is Firewall Enabled
If your Blob is protected by a firewall you will need to perform the following steps in order to allow your Snowflake to connect with your Blob. More information about the following steps can be found in the Snowflake documentation here.
First go into snowflake and run the following command:
select system$get_snowflake_platform_info();This will return a list of the VNet Subnet IDs. This will look something like this:
{"snowflake-vnet-subnet-id":
["some_string","second_string","third_string","fourth_string"]}
You then need to go into your Azure portal and add each of these subnet IDs individually to your Azure storage account network policy by running the following command in the Azure CLI tool:
az storage account network-rule add --account-name <your_storage_account_name> --resource-group <your_resource_group> --subnet "<snowflake_provided_vnet_subnet_id>"Replacing <your_storage_account_name> and <your_resource_group> with the appropriate names and <snowflake_provided_vnet_subnet_id> with each of the strings returned from the Snowflake command above. In the example above where four IDs are returned you need to run the command four times, once with each string.
If this is failing ensure you have copied the IDs correctly and have included the double quotation marks surrounding them.
Your Snowflake should now be able to connect to your blob.
Updated 3 months ago
